Upgrading to Windows 11: A Comprehensive Guide
Related Articles: Upgrading to Windows 11: A Comprehensive Guide
Introduction
In this auspicious occasion, we are delighted to delve into the intriguing topic related to Upgrading to Windows 11: A Comprehensive Guide. Let’s weave interesting information and offer fresh perspectives to the readers.
Table of Content
Upgrading to Windows 11: A Comprehensive Guide
Windows 11, the latest iteration of Microsoft’s operating system, introduces a range of enhancements and refinements, promising a more modern and streamlined user experience. While Windows 10 continues to be a robust and reliable platform, transitioning to Windows 11 offers several advantages, including a refined visual aesthetic, enhanced security features, and improved performance. This comprehensive guide explores the process of upgrading from Windows 10 to Windows 11, providing detailed instructions and addressing common concerns.
Eligibility and System Requirements:
Before embarking on the upgrade process, it is crucial to ensure that your system meets the minimum requirements for Windows 11. Microsoft has established specific hardware specifications to guarantee optimal performance and compatibility. These requirements include:
- Processor: 1 gigahertz (GHz) or faster with two or more cores.
- RAM: 4 gigabytes (GB) of RAM.
- Storage: 64 gigabytes (GB) or larger storage device.
- System Firmware: UEFI, Secure Boot capable.
- TPM: Trusted Platform Module (TPM) version 2.0.
- Display: High-definition (720p) display with a minimum diagonal of 9 inches.
- Graphics Card: Compatible with DirectX 12 or later with WDDM 2.x driver.
- Internet Connection: Required for downloading and activating Windows 11.
Checking System Compatibility:
Microsoft provides a dedicated tool to assess your system’s compatibility with Windows 11. This tool, known as the PC Health Check app, can be downloaded from the Microsoft website. Running the PC Health Check app will identify any potential issues or missing requirements that may hinder the upgrade process.
Backup and Data Transfer:
Before initiating the upgrade, it is highly recommended to create a complete backup of your system. This precaution safeguards your valuable data in case unforeseen issues arise during the upgrade process. Backup options include:
- Cloud Backup: Utilizing cloud storage services like OneDrive or Google Drive to store your data online.
- External Hard Drive: Backing up your data to an external hard drive for safekeeping.
- System Image Backup: Creating a system image of your entire hard drive, preserving the operating system and all its files.
Upgrade Methods:
Windows 11 can be installed through two primary methods:
-
Windows Update: This method utilizes the built-in Windows Update feature to download and install the latest version of Windows. It is the recommended method for most users, as it simplifies the process and ensures compatibility.
-
Clean Installation: This method involves formatting the hard drive and installing Windows 11 from scratch. This option is recommended for users who want to completely wipe their system or experience potential performance issues.
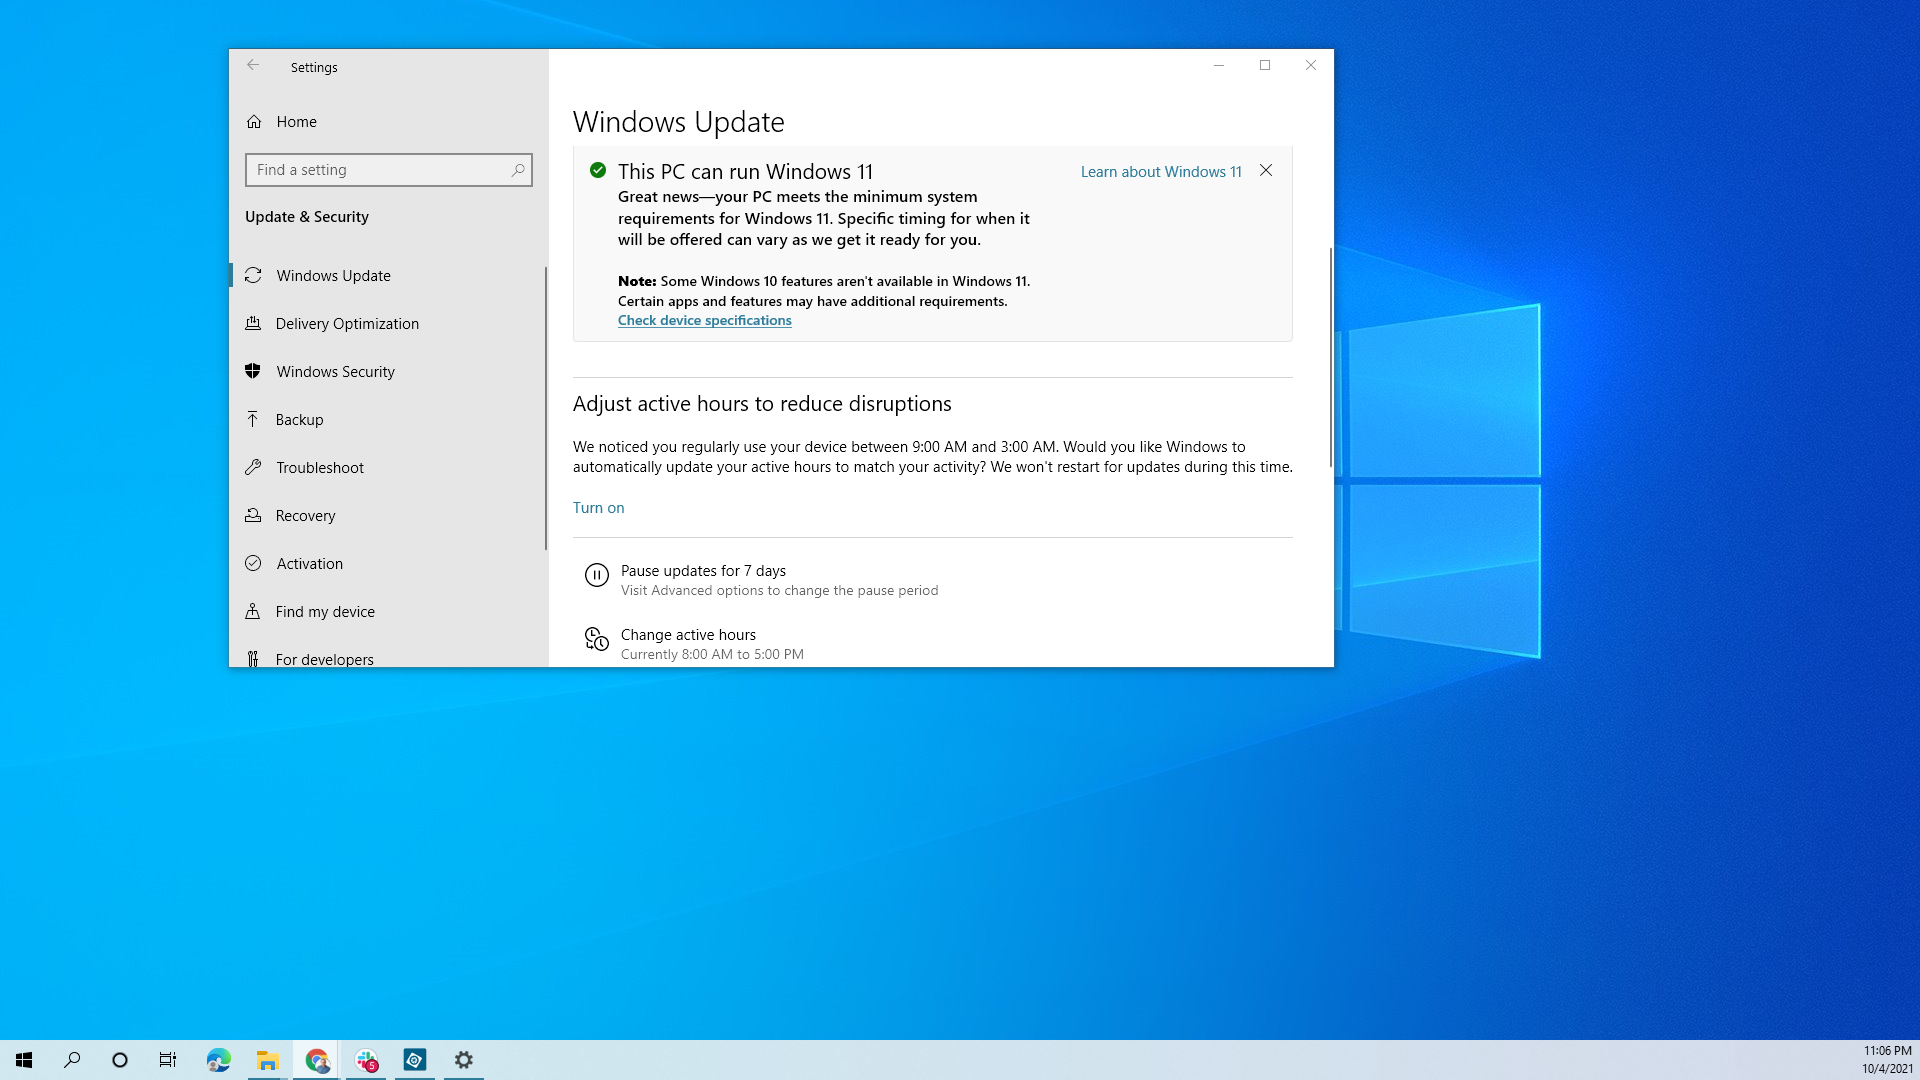
Upgrading via Windows Update:
- Check for Updates: Open the Settings app, navigate to Windows Update, and click on Check for updates.
- Download and Install: If Windows 11 is available for your system, the update will be listed. Click on Download and install to initiate the process.
- Restart and Upgrade: The system will restart and proceed with the upgrade process. This may take several hours, depending on your hardware and internet connection.
Performing a Clean Installation:
- Create a Bootable USB Drive: Download the Windows 11 installation media from the Microsoft website and create a bootable USB drive.
- Boot from USB Drive: Boot your computer from the USB drive by changing the boot order in the BIOS settings.
- Install Windows 11: Follow the on-screen instructions to install Windows 11. This involves partitioning the hard drive and choosing the desired settings.
- Transfer Data: Once Windows 11 is installed, you can transfer your data from the backup to the new system.
Troubleshooting and Common Issues:
While the upgrade process is generally straightforward, some users may encounter issues. Common problems include:
- System Requirements: Ensure your system meets the minimum requirements for Windows 11.
- Driver Compatibility: Some drivers may not be compatible with Windows 11. Update or install compatible drivers from the manufacturer’s website.
- Storage Space: Ensure sufficient storage space is available for the upgrade.
- Network Connection: A stable internet connection is required for the download and installation process.
- Compatibility Issues: Certain software or hardware may not be fully compatible with Windows 11.
FAQs about Converting Windows 10 to Windows 11:
Q: Will I lose my data after upgrading to Windows 11?
A: No, your data should remain intact during the upgrade process. However, it is still highly recommended to create a backup before upgrading.
Q: Can I downgrade back to Windows 10 after upgrading to Windows 11?
A: Yes, you can downgrade back to Windows 10 within 10 days of upgrading. After this period, the option to downgrade may become unavailable.
Q: What happens to my applications after upgrading to Windows 11?
A: Most applications should continue to work after upgrading to Windows 11. However, some applications may require updates or compatibility adjustments.
Q: How long does it take to upgrade to Windows 11?
A: The upgrade time varies depending on your system’s hardware and internet connection. It can take anywhere from 30 minutes to several hours.
Q: Is it necessary to format my hard drive before upgrading to Windows 11?
A: A clean installation requires formatting the hard drive. However, upgrading via Windows Update does not require formatting.
Tips for Upgrading to Windows 11:
- Prepare your system: Ensure your system meets the minimum requirements and create a backup of your data.
- Update drivers: Update your drivers to the latest versions to avoid compatibility issues.
- Check for compatibility: Ensure your applications and hardware are compatible with Windows 11.
- Free up storage space: Ensure sufficient storage space is available for the upgrade.
- Use a stable internet connection: A stable internet connection is crucial for the download and installation process.
- Be patient: The upgrade process may take several hours, depending on your system and internet connection.
Conclusion:
Upgrading to Windows 11 offers a range of benefits, including a refined user interface, enhanced security features, and improved performance. By following the steps outlined in this guide, users can seamlessly transition from Windows 10 to Windows 11, enjoying the latest advancements in operating system technology. It is crucial to ensure system compatibility, create a backup of your data, and follow the recommended upgrade methods for a smooth and successful transition.


Closure
Thus, we hope this article has provided valuable insights into Upgrading to Windows 11: A Comprehensive Guide. We thank you for taking the time to read this article. See you in our next article!