Unveiling the Clarity: Addressing Blurry Text in Windows 10
Related Articles: Unveiling the Clarity: Addressing Blurry Text in Windows 10
Introduction
With great pleasure, we will explore the intriguing topic related to Unveiling the Clarity: Addressing Blurry Text in Windows 10. Let’s weave interesting information and offer fresh perspectives to the readers.
Table of Content
Unveiling the Clarity: Addressing Blurry Text in Windows 10

In the digital landscape, where visual clarity is paramount, encountering blurry text on a Windows 10 system can be a frustrating experience. This issue, often linked to display scaling mismatches or driver conflicts, can significantly impact user experience, particularly for tasks requiring precise text rendering, such as document editing or web browsing. Fortunately, numerous solutions exist to address this problem, restoring text to its crisp and legible state.
Understanding the Root of the Issue
The root cause of blurry text in Windows 10 can be attributed to several factors, including:
- Incorrect Display Scaling: Windows 10 automatically scales the display based on screen resolution and physical size. However, this scaling may not always be accurate, leading to blurry text.
- Outdated or Incompatible Graphics Drivers: Drivers are software programs that enable communication between the operating system and hardware components, including graphics cards. Outdated or incompatible drivers can cause display issues, including blurry text.
- High DPI Settings: High DPI settings, designed to enhance clarity on high-resolution displays, can sometimes lead to blurry text on lower-resolution screens.
- System Performance Issues: Insufficient system resources, such as RAM or CPU power, can strain the system and result in blurry text rendering.
- Display Connection Issues: Faulty or loose connections between the display and the computer can affect display quality, contributing to blurry text.
Navigating the Path to Clarity: A Comprehensive Guide
-
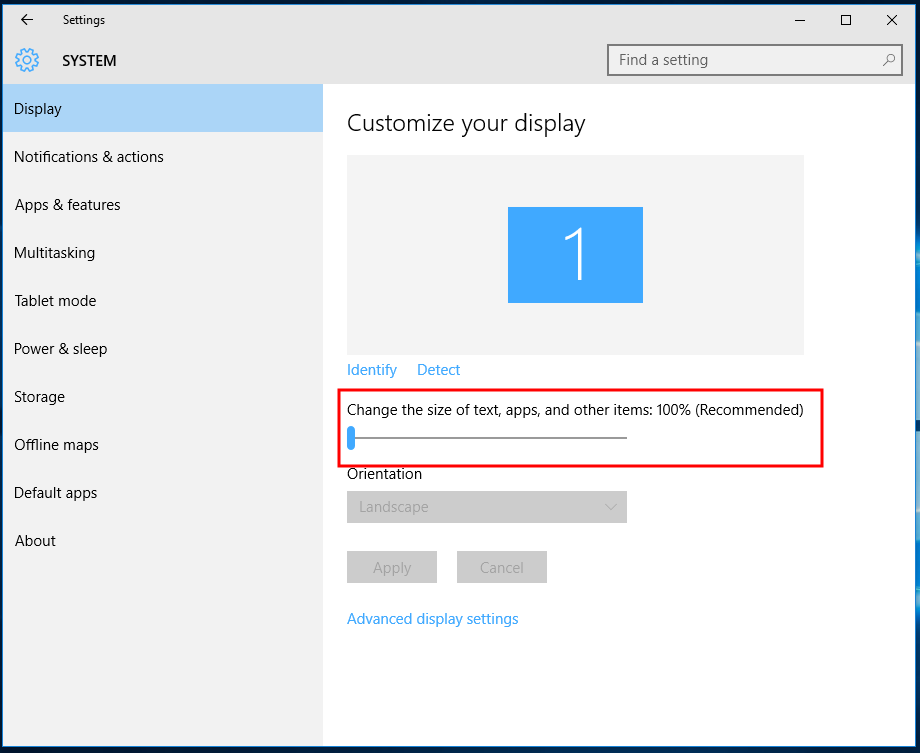
Adjusting Display Scaling:
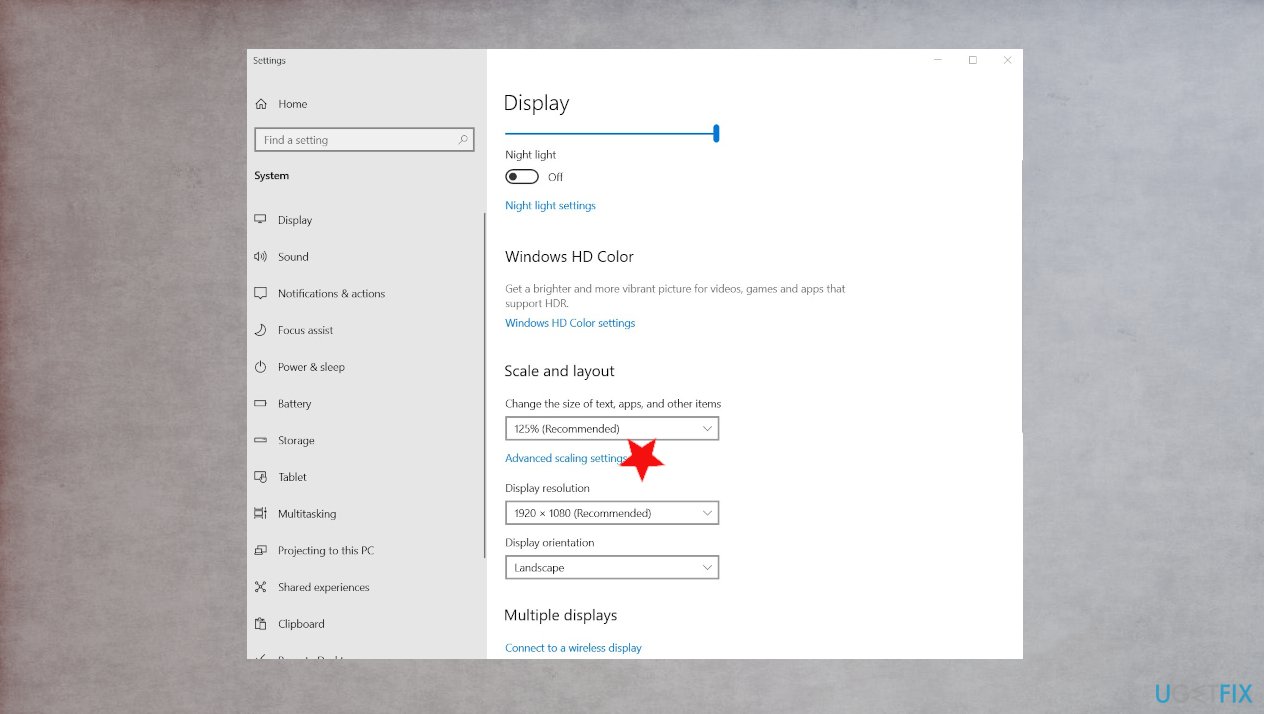
- Accessing Display Settings: Navigate to "Settings" > "System" > "Display."
- Scaling Options: Under the "Scale and Layout" section, select the recommended scaling option for your display. For high-resolution displays, consider setting the scaling to 100%, while for lower-resolution displays, 125% or 150% may be suitable.
- Testing and Refinement: After adjusting scaling, test the text clarity. If necessary, experiment with different scaling percentages until the desired level of sharpness is achieved.
-
Updating Graphics Drivers:
- Automatic Updates: Windows Update automatically installs driver updates. To check for available updates, navigate to "Settings" > "Update & Security" > "Windows Update" and click "Check for updates."
- Manufacturer Websites: Visit the website of your graphics card manufacturer (e.g., NVIDIA, AMD, Intel) to download the latest drivers specifically designed for your model.
- Device Manager: Open the "Device Manager" (search for "Device Manager" in the Windows search bar). Expand the "Display Adapters" section and right-click on your graphics card. Select "Update driver" and follow the on-screen prompts.
-
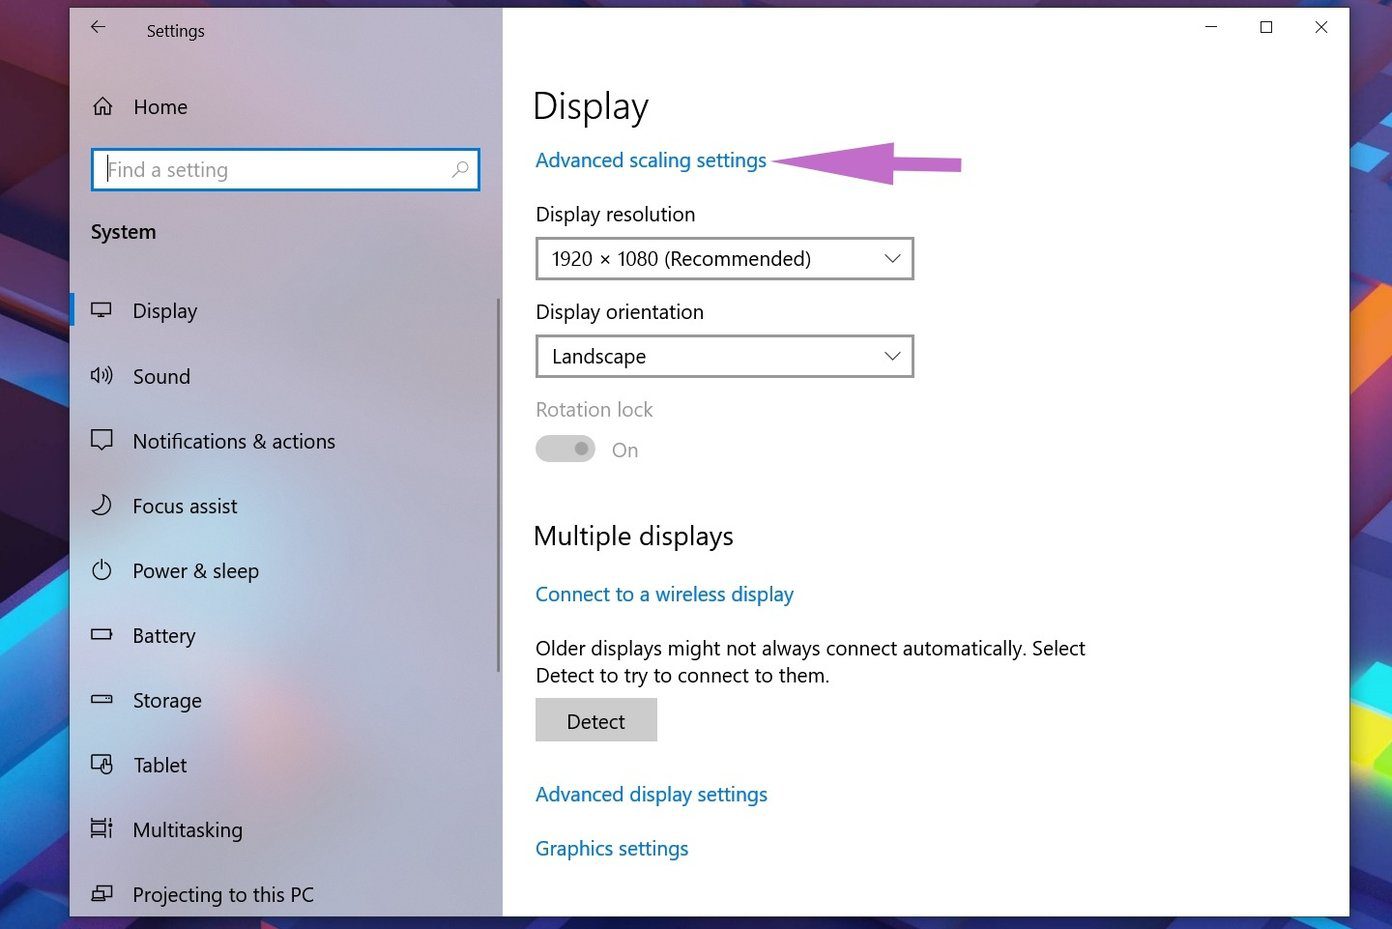
Optimizing DPI Settings:
- Accessing DPI Settings: Right-click on the desktop and select "Display settings."
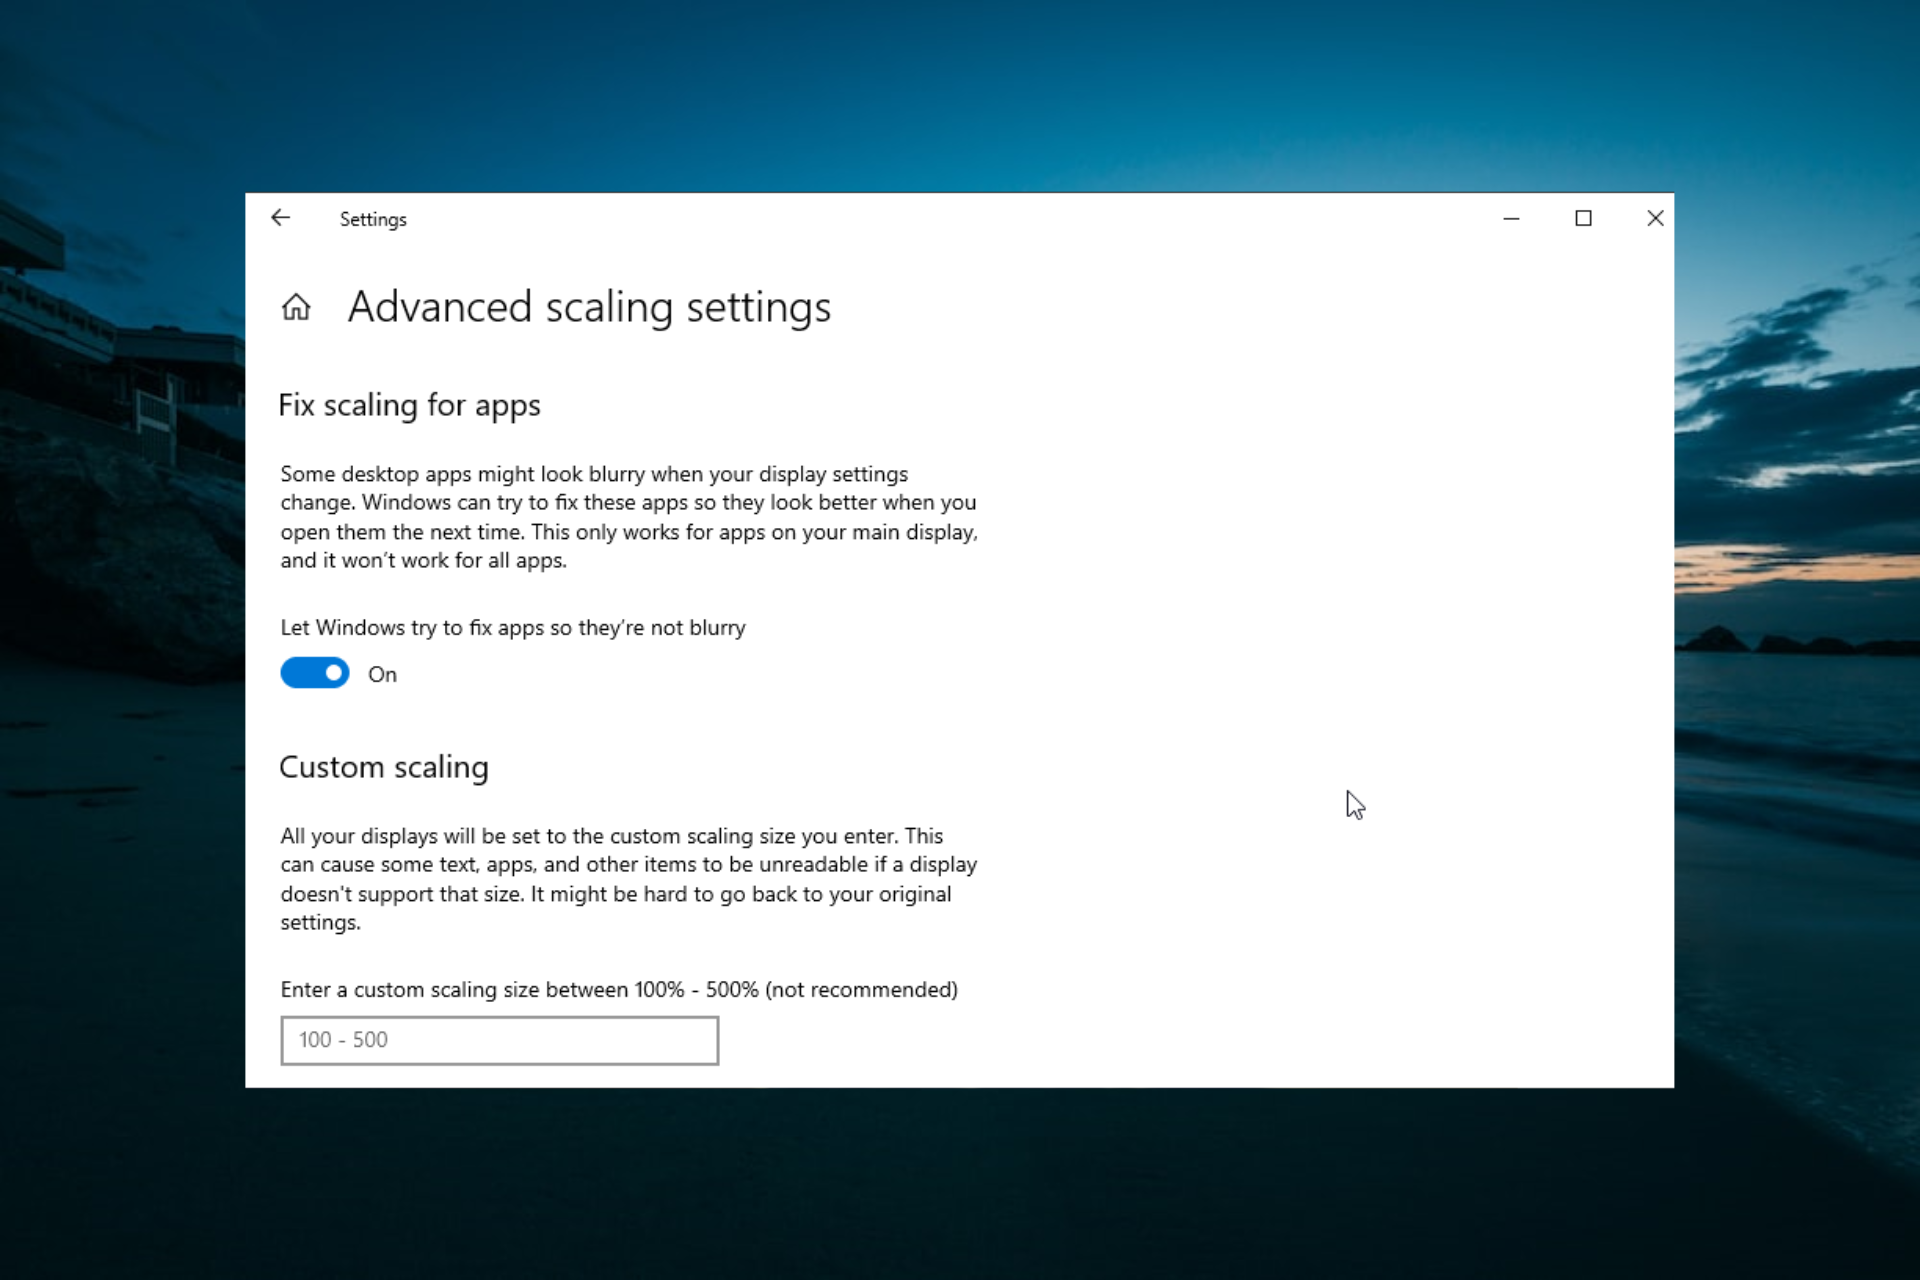
- Custom DPI Scaling: Under the "Scale and Layout" section, click "Advanced scaling settings."
- Application-Specific Scaling: Select the "Let me choose one scaling level for all my displays" option. This enables you to set a specific DPI scaling level for all applications.
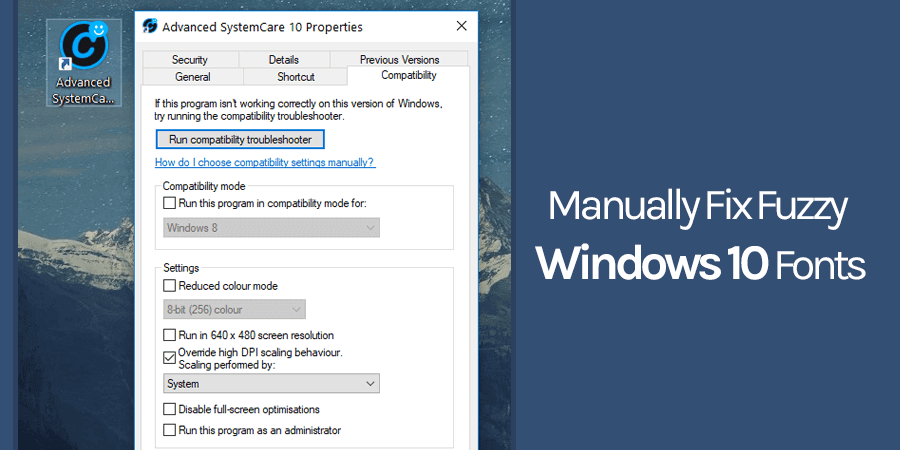
- Individual Application Scaling: To adjust DPI scaling for specific applications, navigate to the application’s executable file, right-click, and select "Properties." Under the "Compatibility" tab, check the box for "Override high DPI scaling behavior" and select the desired scaling level from the dropdown menu.
-
Enhancing System Performance:
- Closing Unnecessary Applications: Close programs that are not actively being used, as they consume system resources.
- Disabling Background Processes: Disable unnecessary background processes and services to free up resources.
- Running a Disk Cleanup: Run a disk cleanup to remove temporary files and unnecessary data, freeing up disk space.
- Optimizing Startup Items: Minimize the number of programs that automatically launch at startup.
- Increasing RAM: If your system has limited RAM, consider upgrading to increase available memory.
-
Verifying Display Connections:
- Secure Connections: Ensure that the display cable (HDMI, DisplayPort, or VGA) is securely connected to both the computer and the display.
- Cable Integrity: Inspect the cable for any damage or wear, and replace it if necessary.
- Alternative Connections: If possible, try connecting the display using a different port or cable to rule out connection issues.
Troubleshooting Common Issues:
- Blurry Text in Specific Applications: If blurry text occurs only in certain applications, it may be due to the application’s own scaling settings. Check the application’s settings for DPI-related options.
- Blurry Text After Updating Drivers: If blurry text appears after updating graphics drivers, try rolling back to the previous driver version.
- Blurry Text on a New Display: If you have recently connected a new display, ensure that the display settings are correctly configured for the new screen resolution.
Frequently Asked Questions
Q: Why is my text blurry after upgrading to Windows 10?
A: Upgrading to Windows 10 might necessitate adjustments to display settings, including scaling and DPI, to optimize text clarity for your specific display.
Q: What are the benefits of fixing blurry text in Windows 10?
A: Resolving blurry text improves visual clarity, enhancing readability and reducing eye strain. This benefits users engaging in tasks requiring precise text rendering, such as document editing, web browsing, and code development.
Q: Is it possible to fix blurry text without updating drivers?
A: While updating drivers is often effective, adjusting display scaling and DPI settings can also address blurry text without driver updates.
Q: How can I prevent blurry text from occurring in the future?
A: Regularly updating graphics drivers, avoiding unnecessary background processes, and maintaining optimal system performance can minimize the likelihood of blurry text issues.
Tips for Optimizing Text Clarity:
- Use a High-Quality Display: A high-resolution display with good pixel density can significantly improve text clarity.
- Adjust Text Size: Experiment with different text sizes in system settings and applications to find the optimal level of readability.
- Enable ClearType: ClearType is a technology that enhances text clarity on LCD displays. Access ClearType settings by searching for "ClearType" in the Windows search bar.
- Use a Screen Magnifier: For users with visual impairments, a screen magnifier can enlarge text, making it easier to read.
Conclusion
Blurry text in Windows 10 can be a frustrating obstacle, hindering productivity and comfort. By understanding the underlying causes and implementing the solutions outlined in this guide, users can restore text clarity and enjoy a seamless digital experience. From adjusting display scaling to optimizing system performance, a combination of approaches can effectively address this common issue, ensuring a visually pleasing and efficient computing environment.


Closure
Thus, we hope this article has provided valuable insights into Unveiling the Clarity: Addressing Blurry Text in Windows 10. We thank you for taking the time to read this article. See you in our next article!