Understanding Ports and Their Importance in Windows 10
Related Articles: Understanding Ports and Their Importance in Windows 10
Introduction
With enthusiasm, let’s navigate through the intriguing topic related to Understanding Ports and Their Importance in Windows 10. Let’s weave interesting information and offer fresh perspectives to the readers.
Table of Content
Understanding Ports and Their Importance in Windows 10
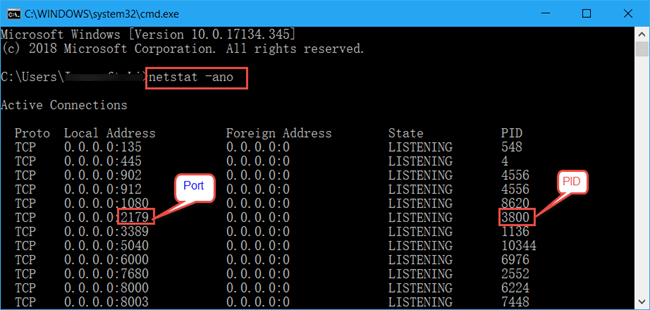
Before delving into the process of "deleting" ports, it’s crucial to understand what ports are and their significance within the Windows 10 operating system. Ports, in the context of computer networking, are virtual pathways that facilitate communication between applications and services running on a computer and the external network.
Imagine a bustling airport with numerous gates. Each gate represents a specific port, enabling different airlines (applications) to connect with various destinations (services) across the globe. Similarly, ports on a computer act as specific points of entry for incoming and outgoing data, allowing different programs to interact with the internet and other devices.
Each port is assigned a unique number, ranging from 0 to 65535. These numbers serve as identifiers, enabling the operating system to direct incoming data to the correct application or service. For instance, port 80 is commonly used for HTTP (Hypertext Transfer Protocol) traffic, facilitating web browsing. Similarly, port 443 handles HTTPS traffic, ensuring secure communication over the internet.
The misconception about "deleting" ports:
It’s important to emphasize that directly "deleting" ports in Windows 10 is not possible. Ports are integral to the operating system’s functionality and cannot be physically removed. However, you can effectively disable specific ports, effectively preventing applications and services from using them for communication. This process is often referred to as "blocking" or "closing" ports, which achieves a similar outcome as deleting them.
Why would someone want to disable ports?
There are several reasons why users might choose to disable specific ports on their Windows 10 computer:
- Security Enhancement: Disabling unused ports can strengthen security by reducing the attack surface. Cybercriminals often exploit vulnerabilities in open ports to gain unauthorized access to a system. By closing unnecessary ports, you minimize potential entry points for malicious actors.
- Resource Management: Disabling ports associated with services or applications that are no longer in use can free up valuable system resources, improving performance and efficiency.
- Network Traffic Control: Blocking specific ports can help control network traffic, preventing certain applications from accessing the internet or other devices. This can be particularly useful for managing bandwidth consumption or restricting access to specific websites or services.
- Troubleshooting: Disabling ports can aid in troubleshooting network connectivity issues. By isolating potential problem areas, you can identify and resolve connectivity problems more effectively.
Methods for Disabling Ports in Windows 10
Several methods can be employed to disable ports in Windows 10. Each method offers different levels of control and complexity, catering to varying user needs and technical expertise.
1. Using the Windows Firewall:
The Windows Firewall is a built-in security feature that provides a basic level of port control. It allows you to block incoming connections to specific ports, effectively preventing applications and services from utilizing them.
Steps to Disable Ports using Windows Firewall:
- Open the Windows Firewall: Search for "Windows Firewall" in the Windows search bar and select "Windows Defender Firewall."
- Navigate to Advanced Settings: In the left pane, click on "Advanced settings."
- Create an Inbound Rule: Click on "Inbound Rules" and then "New Rule."
- Choose Rule Type: Select "Custom" and click "Next."
- Select Program: Choose "All programs" and click "Next."
- Protocol and Ports: Select "TCP" or "UDP" based on the protocol used by the application or service you want to block. Under "Specific local ports," enter the port number you wish to disable. Click "Next."
- Action: Select "Block the connection" and click "Next."
- Profile: Choose the profiles for which you want to apply the rule (Domain, Private, Public). Click "Next."
- Name and Description: Provide a descriptive name for the rule and click "Finish."
2. Using the Command Prompt:
The Command Prompt offers a more advanced method for managing ports, allowing you to control both incoming and outgoing connections.
Steps to Disable Ports using Command Prompt:
- Open the Command Prompt: Search for "cmd" in the Windows search bar and run as administrator.
- Use the "netsh" command: The "netsh" command provides a powerful interface for managing network connections.
-
Disable Incoming Connections:
netsh firewall add rule name="Block_Port_Number" dir=in action=block protocol=tcp localport=Port_Number- Replace "Block_Port_Number" with a descriptive name for the rule.
- Replace "Port_Number" with the port number you want to disable.
-
Disable Outgoing Connections:
netsh firewall add rule name="Block_Port_Number" dir=out action=block protocol=tcp localport=Port_Number- Replace "Block_Port_Number" with a descriptive name for the rule.
- Replace "Port_Number" with the port number you want to disable.
3. Using Third-Party Firewall Software:
Third-party firewall software offers more comprehensive port control features, allowing you to create granular rules for specific applications and services. These tools often provide user-friendly interfaces, making port management more accessible to users with limited technical expertise.
Steps to Disable Ports using Third-Party Firewall Software:
- Install and Configure the Firewall: Download and install a reputable firewall software like ZoneAlarm, ESET NOD32, or Bitdefender.
- Access Port Settings: Navigate to the firewall settings, usually found under "Advanced Settings" or "Firewall Rules."
- Create a New Rule: Choose "Block" as the action and specify the port number you want to disable.
- Select the Application or Service: If applicable, choose the specific application or service associated with the port.
- Apply the Rule: Save the rule and enable it for the selected profiles (Domain, Private, Public).
4. Using Registry Editor:
The Registry Editor provides a low-level method for managing port settings, offering advanced control but requiring caution due to potential system instability if incorrectly manipulated.
Steps to Disable Ports using Registry Editor:
- Open Registry Editor: Search for "regedit" in the Windows search bar and run as administrator.
-
Navigate to the Relevant Key: Navigate to the following key:
HKEY_LOCAL_MACHINESYSTEMCurrentControlSetServicesTcpipParameters - Create a New DWORD Value: Right-click in the right pane and select "New" > "DWORD (32-bit) Value."
- Name the Value: Name the value "TcpTimedWaitDelay" or "TcpMaxConnectRetransmissions" depending on the desired effect.
-
Set the Value: Double-click the newly created value and set the "Value data" to a specific number.
-
TcpTimedWaitDelay: This value controls the duration a connection remains in the TIME_WAIT state after closing. Increasing this value can reduce the number of available ports. -
TcpMaxConnectRetransmissions: This value sets the maximum number of retransmission attempts for establishing a connection. Increasing this value can reduce the number of available ports.
-
- Restart the Computer: Restart your computer for the changes to take effect.
Important Considerations:
- Port Blocking vs. Port Forwarding: Blocking ports prevents incoming and outgoing traffic, while port forwarding redirects incoming traffic to a specific application or service on your computer.
- Impact on Applications and Services: Disabling ports can prevent applications and services from functioning correctly. It’s crucial to carefully consider the consequences before blocking any ports.
- Understanding Network Protocols: TCP (Transmission Control Protocol) and UDP (User Datagram Protocol) are the most common network protocols used for communication. Ensure you understand the protocol associated with the port you want to disable.
- Using Firewall Software: While Windows Firewall provides basic port control, third-party firewall software often offers more advanced features and granular control over port settings.
FAQs on Disabling Ports in Windows 10:
Q: Can I disable all ports on my computer?
A: Disabling all ports is not recommended as it would prevent your computer from accessing the internet and other networks. It would effectively isolate your computer from the external world.
Q: What happens if I disable a port that is used by a critical system service?
A: Disabling a port used by a critical system service can lead to system instability or malfunction. This can disrupt essential system functions and potentially cause data loss.
Q: How do I know which ports are used by specific applications?
A: You can use tools like "Resource Monitor" (available in Windows Task Manager) or third-party network monitoring software to identify the ports used by different applications.
Q: Can I disable a port temporarily?
A: Yes, you can disable a port temporarily by creating a firewall rule with a specific time limit.
Q: Is it safe to disable ports?
A: Disabling ports can enhance security, but it’s crucial to understand the potential consequences before blocking any ports. Always research the port’s purpose and ensure you are not disabling a critical service.
Tips for Disabling Ports in Windows 10:
- Start with the Windows Firewall: Use the Windows Firewall to block basic ports before exploring more advanced methods.
- Research the Port Purpose: Before disabling a port, research its purpose and ensure it’s not associated with a critical system service or application.
- Use a Third-Party Firewall: Consider using a reputable third-party firewall for more comprehensive port management and advanced features.
- Create a System Restore Point: Create a system restore point before making significant changes to your port settings to revert to a previous state if necessary.
- Monitor for Issues: After disabling ports, monitor your computer’s performance and functionality for any unexpected issues.
Conclusion:
Disabling ports in Windows 10 can be a valuable tool for enhancing security, managing network traffic, and troubleshooting connectivity issues. However, it’s crucial to understand the implications of port blocking and proceed with caution. Always research the port’s purpose, avoid disabling ports used by critical system services, and use reliable tools for port management. By following these guidelines, you can effectively manage port settings in Windows 10 while maintaining system stability and security.


Closure
Thus, we hope this article has provided valuable insights into Understanding Ports and Their Importance in Windows 10. We appreciate your attention to our article. See you in our next article!