Removing the Windows 11 "Get Started" Experience: A Guide to Streamlined Setup
Related Articles: Removing the Windows 11 "Get Started" Experience: A Guide to Streamlined Setup
Introduction
In this auspicious occasion, we are delighted to delve into the intriguing topic related to Removing the Windows 11 "Get Started" Experience: A Guide to Streamlined Setup. Let’s weave interesting information and offer fresh perspectives to the readers.
Table of Content
Removing the Windows 11 "Get Started" Experience: A Guide to Streamlined Setup
The "Get Started" experience in Windows 11, while intended to guide users through initial setup, can sometimes feel intrusive or unnecessary for experienced users. This guide outlines various methods to remove or bypass this feature, allowing for a more direct and personalized initial setup experience.
Understanding the "Get Started" Experience
The "Get Started" experience in Windows 11 presents users with a series of guided steps and prompts, designed to:
- Set up basic system settings: This includes configuring language, region, and keyboard layout.
- Connect to a Wi-Fi network: Users are guided through connecting to an available wireless network.
- Log in with a Microsoft account: Users are encouraged to link their Microsoft account for cloud synchronization and personalized features.
- Customize privacy settings: Users are presented with options to adjust privacy levels for various system functions.
- Explore key features: Windows 11 highlights new features and functionalities, guiding users towards their potential benefits.
Why Remove the "Get Started" Experience?
While the "Get Started" experience aims to be helpful, it may not suit all users. Reasons for wanting to remove or bypass this feature include:
- Experienced users: Users familiar with Windows operating systems may find the guided steps redundant and time-consuming.
- Specific setup preferences: Some users may have specific configurations in mind that differ from the default settings suggested during the initial setup.
- Customization control: Experienced users often prefer to customize their system settings independently, rather than being guided through a pre-defined path.
- Time efficiency: Removing the "Get Started" experience streamlines the initial setup process, allowing users to access their desktop and applications more quickly.
Methods to Remove or Bypass the "Get Started" Experience
Several methods can be employed to remove or bypass the "Get Started" experience, offering varying levels of control and complexity.
1. Disabling the "Get Started" Experience During Installation
The most straightforward method involves disabling the "Get Started" experience during the initial installation of Windows 11. This option is available during the setup process, allowing users to choose a more streamlined experience.
Steps:
- Begin the Windows 11 installation: Initiate the installation process from a bootable USB drive or DVD.
- Select "Custom" installation: Choose the "Custom" option instead of the default "Upgrade" option.
- Advanced options: During the advanced options screen, locate the "Get Started" experience setting.
- Disable the feature: Toggle the setting to disable the "Get Started" experience.
- Proceed with installation: Continue with the installation process, bypassing the guided setup steps.
2. Using the "Shift" Key During Startup
For existing installations of Windows 11, a simple keyboard shortcut can bypass the "Get Started" experience.
Steps:
- Restart the computer: Reboot the system to initiate the startup process.
- Press and hold the "Shift" key: While the computer is booting, press and hold the "Shift" key on the keyboard.
- Bypass the "Get Started" experience: Holding the "Shift" key during startup will bypass the guided setup steps, allowing direct access to the desktop.
3. Modifying the Registry
Advanced users can modify the Windows Registry to disable the "Get Started" experience permanently. This method requires caution and should only be attempted by users familiar with the Registry editor.
Steps:
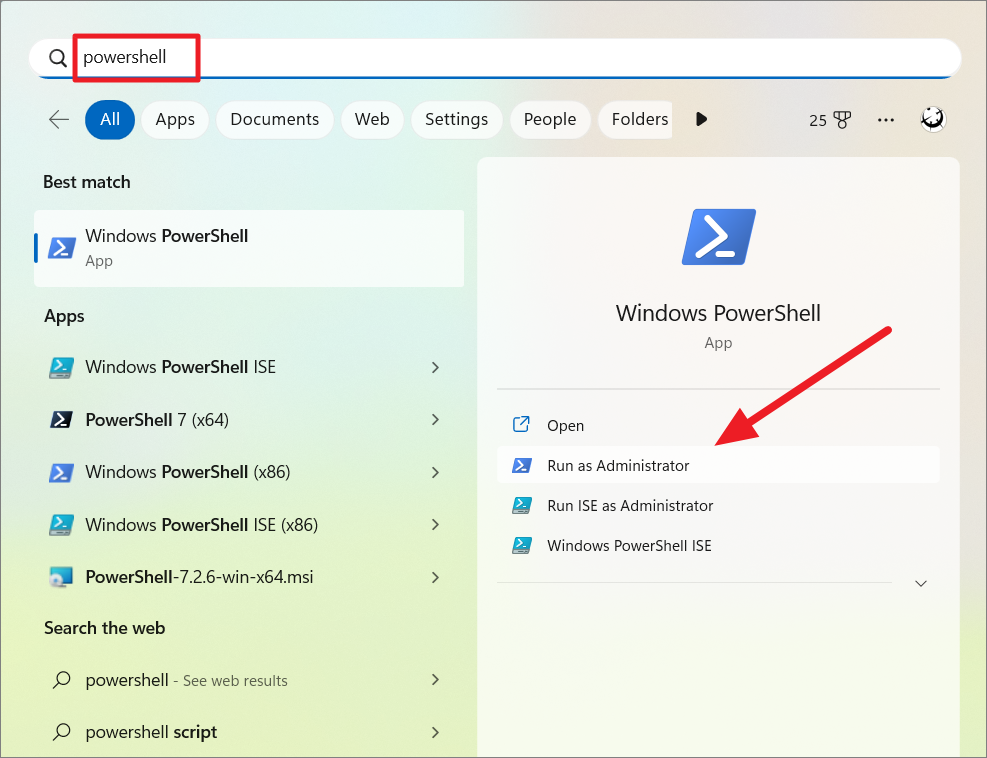
- Open the Registry Editor: Search for "regedit" in the Windows search bar and open the Registry Editor.
-
Navigate to the relevant key: Go to the following location:
HKEY_LOCAL_MACHINESOFTWAREMicrosoftWindowsCurrentVersionOOBEUserExperience - Create a new DWORD value: Right-click within the "UserExperience" folder and select "New" > "DWORD (32-bit) Value."
- Name the value: Name the new value "SkipInitialSetup."
- Set the value data: Double-click the "SkipInitialSetup" value and set the "Value data" to "1."
- Close the Registry Editor: Close the Registry Editor and restart the computer.
4. Using Third-Party Tools
Several third-party tools are available to bypass or disable the "Get Started" experience. These tools often offer a user-friendly interface and can automate the process.
Note: Exercise caution when using third-party tools, as some may not be reliable or compatible with your system.
5. Manual Configuration
While not a direct method to remove the "Get Started" experience, manually configuring settings after the initial setup can achieve a similar effect. This approach allows users to customize their system according to their preferences.
Steps:
- Complete the initial setup: Go through the "Get Started" experience and complete the basic system configuration.
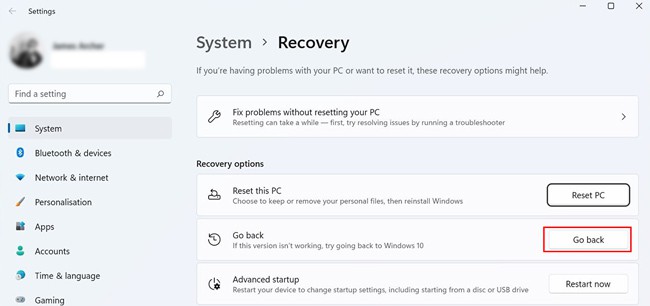
- Access system settings: Open the "Settings" app by pressing "Windows key + I."
- Customize settings: Navigate through various settings categories, including "Personalization," "System," and "Accounts," to adjust settings to your liking.
FAQs
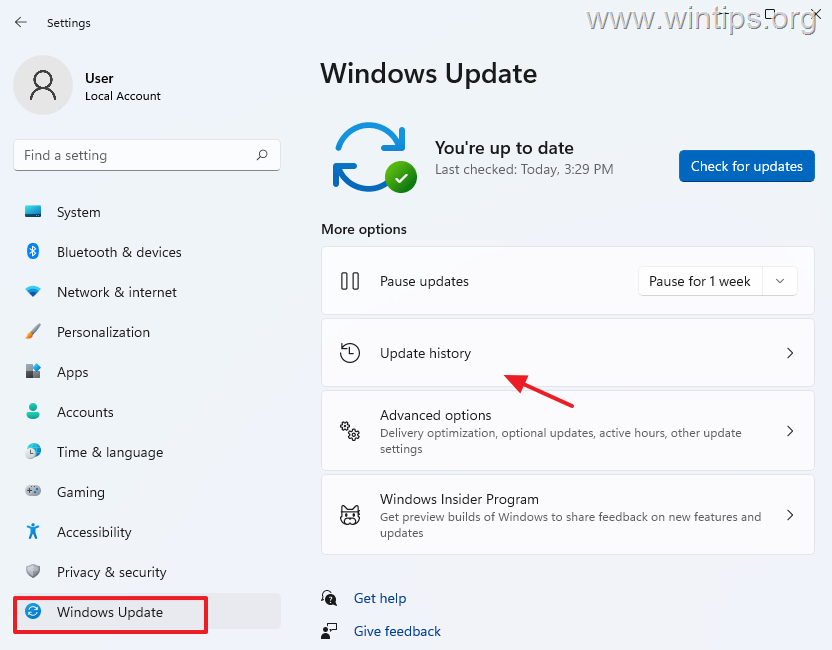
Q: Will disabling the "Get Started" experience affect system updates or future installations?
A: Disabling the "Get Started" experience does not affect system updates or future installations. The initial setup process is completed, and subsequent updates and installations will not be affected.
Q: Can I re-enable the "Get Started" experience after disabling it?
A: Re-enabling the "Get Started" experience after disabling it may require a clean installation of Windows 11 or a registry modification.
Q: Is it safe to use third-party tools to remove the "Get Started" experience?
A: While third-party tools can be helpful, it’s crucial to use reputable sources and scan them for malware before installing them. Always back up your system before using any third-party tool.
Tips
- Back up your system: Before making any significant changes to your system, create a backup to restore it to its previous state if needed.
- Research carefully: Before using any third-party tool, research its reputation and compatibility with your system.
- Consult official documentation: Refer to official Microsoft documentation for detailed instructions and troubleshooting tips.
- Seek professional help: If you encounter issues or are unsure about modifying your system, consult a qualified IT professional.
Conclusion
Removing or bypassing the Windows 11 "Get Started" experience provides users with a more streamlined and personalized initial setup experience. By choosing the most suitable method, users can customize their system settings and access their desktop efficiently. While the "Get Started" experience is designed to be helpful, users should feel empowered to customize their setup experience according to their individual needs and preferences.


Closure
Thus, we hope this article has provided valuable insights into Removing the Windows 11 "Get Started" Experience: A Guide to Streamlined Setup. We hope you find this article informative and beneficial. See you in our next article!