Personalizing Your Digital Welcome: A Guide to Changing Windows 10 Startup Sounds
Related Articles: Personalizing Your Digital Welcome: A Guide to Changing Windows 10 Startup Sounds
Introduction
With enthusiasm, let’s navigate through the intriguing topic related to Personalizing Your Digital Welcome: A Guide to Changing Windows 10 Startup Sounds. Let’s weave interesting information and offer fresh perspectives to the readers.
Table of Content
Personalizing Your Digital Welcome: A Guide to Changing Windows 10 Startup Sounds

The familiar chime that greets you upon booting up your Windows 10 device is a subtle but significant part of the user experience. It’s a sonic cue, a brief auditory signature that signifies the start of your digital journey. While the default sound may be pleasant enough, it’s entirely possible to customize this sonic greeting, injecting a touch of personality into your computing environment.
Understanding the Importance of Customization
The ability to alter the startup sound goes beyond mere aesthetics. It represents a fundamental aspect of personalization, allowing users to tailor their digital experience to their individual preferences. A customized startup sound can:
- Enhance User Experience: Replacing the default sound with a more engaging or uplifting melody can create a more positive and enjoyable computing experience.
- Indicate System State: A distinct startup sound can be used to differentiate between different user accounts or system configurations, providing a quick auditory cue about the current operating environment.
- Reflect Personal Style: Choosing a sound that resonates with your personality or interests can make your computer feel more like your own.
- Create a Unique Identity: A customized startup sound can be a subtle way to differentiate your device from others, adding a personal touch to your digital identity.
Methods for Modifying the Startup Sound
There are several methods to modify the startup sound in Windows 10, each with its own advantages and drawbacks.
Method 1: Utilizing the Sound Settings
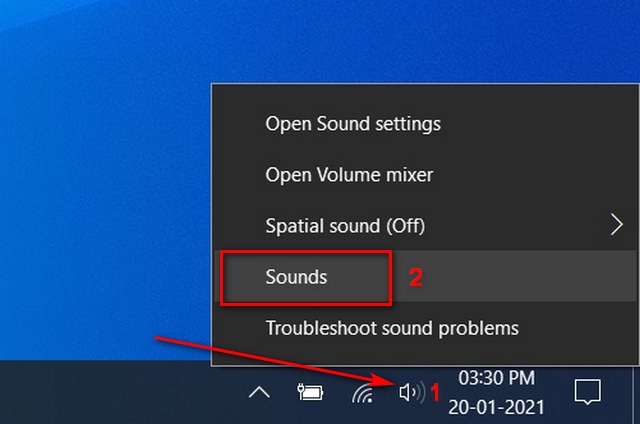
- Accessing the Sound Settings: Navigate to the "Settings" app by clicking the Windows icon in the bottom left corner of your screen. Select "System" from the list of options.
- Locating the Sound Panel: Within the "System" settings, scroll down and click on "Sound."
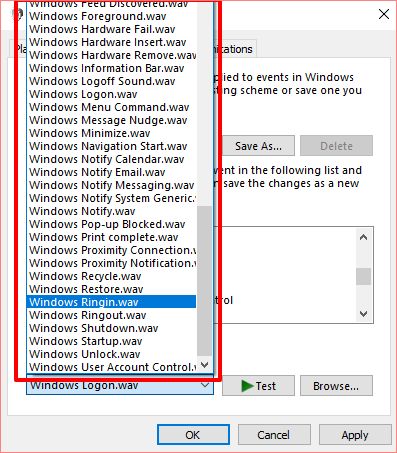
- Choosing a New Sound: In the "Sound" window, click on the "Sounds" tab. Locate the "Windows Startup Sound" entry in the list. Click on the dropdown menu next to it and select a different sound from the available options.
- Confirming the Change: Click on the "Apply" button to save the changes. The next time you boot up your computer, you will hear the newly selected sound.
Method 2: Employing the Registry Editor
This method involves modifying the Windows registry, which requires caution as incorrect edits can lead to system instability.
- Opening the Registry Editor: Press the "Windows" key + "R" to open the "Run" dialog box. Type "regedit" and press "Enter."
-
Navigating to the Relevant Key: In the Registry Editor, navigate to the following key:
HKEY_CURRENT_USERAppEventsEventLabelsSystemWindowsStart -
Modifying the "Start" Value: Double-click on the "Start" value in the right pane. Change the "Value data" field to the path of the desired sound file. This path should be in the following format:
C:Pathtosoundfile.wav - Exiting the Registry Editor: Close the Registry Editor and restart your computer for the changes to take effect.
Method 3: Utilizing Third-Party Software
Several third-party applications are available that offer advanced customization options for Windows startup sounds, including the ability to set multiple sounds for different events or create custom sound profiles.
- Choosing a Suitable Application: Research and select a reputable third-party application designed for customizing Windows sounds.
- Installing the Software: Download and install the chosen software according to the provided instructions.
- Configuring Startup Sounds: Use the software’s interface to select or create your desired startup sound.
- Applying the Changes: Save the changes made within the application.
Important Considerations
- Sound File Format: Ensure that the sound file you choose is in a compatible format, such as WAV or MP3.
- File Location: The path to the sound file must be accurate and accessible to the system.
- System Resources: Large or complex sound files may consume more system resources during startup.
- Security: Be cautious when using third-party software, especially if it requires access to system files.
Frequently Asked Questions
Q1: Can I use any sound file as a startup sound?
A1: While you can technically use any sound file, it’s best to choose a short and concise audio clip, preferably in a compatible format like WAV. Avoid using files with excessive volume or complex audio effects, as these can interfere with the system startup process.
Q2: What happens if I delete the default startup sound file?
A2: Deleting the default startup sound file will result in a silent startup. However, it’s not recommended to delete this file, as it may be needed for system updates or troubleshooting.
Q3: Can I use a custom sound for each user account?
A3: Yes, you can set different startup sounds for each user account by modifying the registry key for each individual profile.
Q4: What if I want to disable the startup sound altogether?
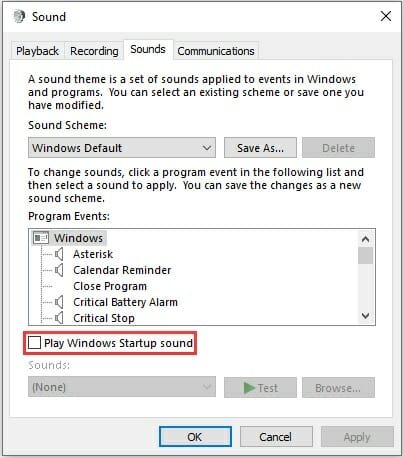
A4: To disable the startup sound, follow the steps outlined in Method 1, but instead of selecting a sound, choose "None" from the dropdown menu.
Q5: Are there any limitations on the length of the startup sound?
A5: While there is no official length restriction, it’s advisable to keep the sound brief, ideally under 5 seconds, to avoid delaying the startup process.
Tips for Choosing the Perfect Startup Sound
- Consider Your Preferences: Select a sound that resonates with your personality and mood.
- Keep it Concise: Opt for a short and sweet sound to avoid interrupting the startup process.
- Choose a High-Quality File: Use a sound file with good audio quality to ensure a clear and pleasant listening experience.
- Test Before Committing: Preview the sound before setting it as your startup sound to ensure it’s the right choice.
Conclusion
Changing the startup sound in Windows 10 is a simple yet effective way to personalize your computing experience. Whether you’re looking to add a touch of whimsy, create a more professional atmosphere, or simply differentiate your device, customizing this sonic greeting can make your computer feel more like your own. Remember to exercise caution when modifying system settings and always back up your data before making significant changes.


Closure
Thus, we hope this article has provided valuable insights into Personalizing Your Digital Welcome: A Guide to Changing Windows 10 Startup Sounds. We appreciate your attention to our article. See you in our next article!