Navigating Windows 11 Troubles: A Guide to Safe Mode at Boot
Related Articles: Navigating Windows 11 Troubles: A Guide to Safe Mode at Boot
Introduction
In this auspicious occasion, we are delighted to delve into the intriguing topic related to Navigating Windows 11 Troubles: A Guide to Safe Mode at Boot. Let’s weave interesting information and offer fresh perspectives to the readers.
Table of Content
- 1 Related Articles: Navigating Windows 11 Troubles: A Guide to Safe Mode at Boot
- 2 Introduction
- 3 Navigating Windows 11 Troubles: A Guide to Safe Mode at Boot
- 3.1 Understanding the Importance of Safe Mode
- 3.2 Accessing Safe Mode at Boot: A Step-by-Step Guide
- 3.3 Frequently Asked Questions:
- 3.4 Tips for Utilizing Safe Mode:
- 3.5 Conclusion:
- 4 Closure
Navigating Windows 11 Troubles: A Guide to Safe Mode at Boot
Windows 11, while a visually appealing and feature-rich operating system, can occasionally encounter difficulties. These problems can manifest as system crashes, slow performance, or persistent error messages. In such scenarios, a valuable tool for troubleshooting and resolving these issues is Safe Mode.
Safe Mode boots Windows 11 with a minimal set of drivers and programs, providing a stripped-down environment that helps identify and address the root cause of system instability. This stripped-down environment eliminates potential conflicts caused by third-party applications or corrupted drivers, allowing users to diagnose and resolve issues effectively.
Understanding the Importance of Safe Mode
Safe Mode acts as a diagnostic tool, enabling users to:
- Isolate and Troubleshoot Software Conflicts: By booting into Safe Mode, users can pinpoint the specific software or driver causing issues, as the limited environment eliminates the interference of other programs.
- Uninstall Problematic Software: Safe Mode allows for the removal of problematic software that might be hindering the system’s performance or causing crashes, without the risk of encountering errors during the uninstallation process.
- Run System Scans and Repairs: Safe Mode provides a secure environment to run system scans for malware or corrupted files, ensuring efficient detection and removal.
- Update or Reinstall Drivers: Safe Mode allows users to update or reinstall drivers that might be outdated or corrupted, ensuring optimal hardware functionality.
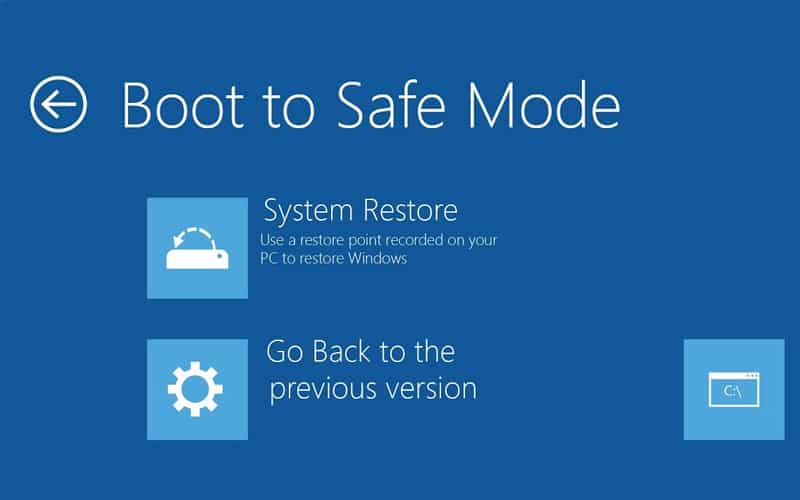
- Restore System Files: Safe Mode provides access to system restore points, enabling users to revert to a previous state where the system was functioning correctly.
Accessing Safe Mode at Boot: A Step-by-Step Guide
There are several methods to access Safe Mode at boot in Windows 11. The most common methods are outlined below:
1. Using the Startup Settings Menu:
- Step 1: Restart the computer.
- Step 2: During the startup process, press and hold the Shift key. This will launch the Startup Settings menu.
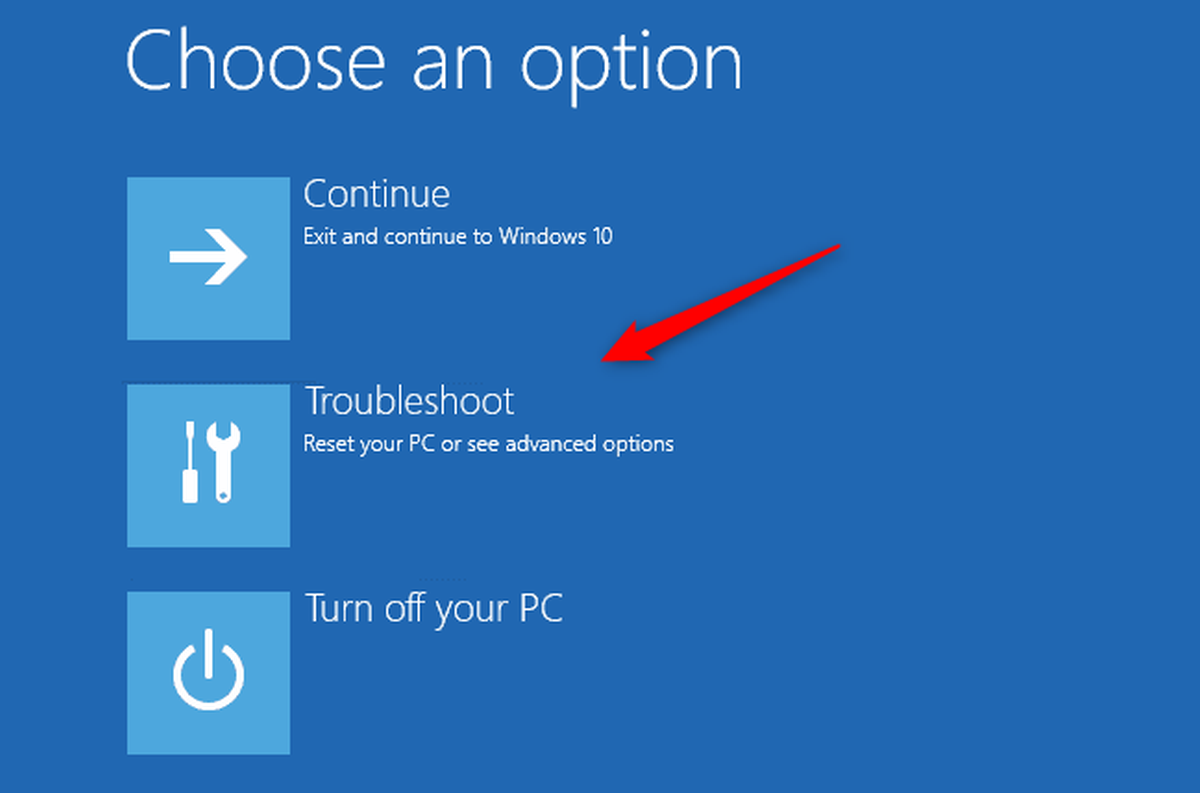
- Step 3: Select Troubleshoot from the menu.
- Step 4: Choose Advanced options.
- Step 5: Click on Startup Settings.
- Step 6: Select Restart.
- Step 7: Press the corresponding number key on your keyboard to choose the desired Safe Mode option. For example, pressing 4 will initiate Enable Safe Mode.
2. Using the Command Prompt:
- Step 1: Restart the computer.
- Step 2: During the startup process, press and hold the Shift key. This will launch the Startup Settings menu.
- Step 3: Select Troubleshoot from the menu.
- Step 4: Choose Advanced options.
- Step 5: Click on Command Prompt.
- Step 6: Type bcdedit /set default bootmenupolicy legacy and press Enter. This command enables the legacy boot menu.
- Step 7: Restart the computer.
- Step 8: Press F8 repeatedly during the startup process. This will launch the Advanced Boot Options menu.
- Step 9: Use the arrow keys to select Safe Mode and press Enter.
3. Using System Configuration (msconfig):
- Step 1: Press Windows key + R to open the Run dialog box.
- Step 2: Type msconfig and press Enter.
- Step 3: Go to the Boot tab.
- Step 4: Check the box next to Safe boot.
- Step 5: Select the desired Safe Mode options (Minimal, Network, or Command Prompt).
- Step 6: Click Apply and then OK.
- Step 7: Restart the computer.
4. Using the Recovery Drive:
- Step 1: Create a recovery drive on a USB flash drive or external hard drive.
- Step 2: Boot from the recovery drive.
- Step 3: Select Troubleshoot from the menu.
- Step 4: Choose Advanced options.
- Step 5: Click on Startup Settings.
- Step 6: Select Restart.
- Step 7: Press the corresponding number key on your keyboard to choose the desired Safe Mode option.
Frequently Asked Questions:
Q: What is the difference between Safe Mode options (Minimal, Network, and Command Prompt)?
A:
- Minimal Safe Mode loads only the essential drivers and services required for basic system operation.
- Safe Mode with Networking includes the network drivers, allowing users to access the internet and network resources.
- Safe Mode with Command Prompt provides access to the command prompt, enabling users to run advanced troubleshooting commands.
Q: How do I exit Safe Mode?
A: To exit Safe Mode, simply restart your computer normally. Windows will boot into its regular mode.
Q: Can I install programs or drivers in Safe Mode?
A: While Safe Mode allows for basic system operations, it is not recommended to install programs or drivers in this environment. This is because Safe Mode lacks certain system components that are necessary for proper installation and functionality.
Q: What if I can’t access Safe Mode at boot?
A: If you are unable to access Safe Mode at boot, you can try using a system repair disc or a bootable USB drive to troubleshoot the issue. You can also contact Microsoft support for assistance.
Tips for Utilizing Safe Mode:
- Identify the Problem: Before entering Safe Mode, try to note the specific error messages or symptoms you are experiencing. This information can help you pinpoint the source of the problem.
- Run System Scans: Once in Safe Mode, run a full system scan using your preferred antivirus software. This can help identify and remove malware that might be causing system instability.
- Check for Corrupted Files: Use the System File Checker (SFC) tool to scan for and repair corrupted system files.
- Update Drivers: Ensure all drivers are up-to-date by checking for updates on the manufacturer’s website or using Windows Update.
- Uninstall Problematic Software: If you suspect a particular program is causing issues, uninstall it in Safe Mode.
- Restore System Files: If you have a system restore point created before the problem occurred, restore your system to that point.
Conclusion:
Safe Mode is a crucial tool for troubleshooting and resolving system issues in Windows 11. By providing a minimal environment, it allows users to diagnose problems, uninstall problematic software, run system scans, and perform other essential tasks without interference from other programs. Understanding the different Safe Mode options and utilizing them effectively can significantly improve the stability and performance of your Windows 11 system. Remember to always back up your important data before attempting any troubleshooting steps, ensuring the safety of your files in case of unforeseen issues.


Closure
Thus, we hope this article has provided valuable insights into Navigating Windows 11 Troubles: A Guide to Safe Mode at Boot. We thank you for taking the time to read this article. See you in our next article!