Navigating the BIOS for Windows 11: A Comprehensive Guide
Related Articles: Navigating the BIOS for Windows 11: A Comprehensive Guide
Introduction
In this auspicious occasion, we are delighted to delve into the intriguing topic related to Navigating the BIOS for Windows 11: A Comprehensive Guide. Let’s weave interesting information and offer fresh perspectives to the readers.
Table of Content
Navigating the BIOS for Windows 11: A Comprehensive Guide
The Basic Input/Output System (BIOS) is a fundamental piece of software that resides on your computer’s motherboard. It acts as the intermediary between your hardware and operating system, enabling your computer to boot up and operate correctly. While the BIOS is often overlooked, it plays a crucial role in ensuring optimal system performance and compatibility. This guide will explore the intricacies of the BIOS, particularly in relation to Windows 11, providing a comprehensive understanding of its features and how to navigate its settings effectively.
Understanding the BIOS and its Importance
The BIOS is a critical component of any computer system. It performs several essential tasks, including:
- Booting the System: When you turn on your computer, the BIOS is the first software to execute. It initializes the hardware, checks for errors, and loads the operating system.
- Hardware Configuration: The BIOS allows you to configure and manage various hardware components, such as the boot order, hard drive settings, and system clock.
- Security Settings: The BIOS provides security features like password protection, boot security measures, and system integrity checks.
- System Information: The BIOS displays information about your system’s hardware, including the processor, memory, and storage devices.
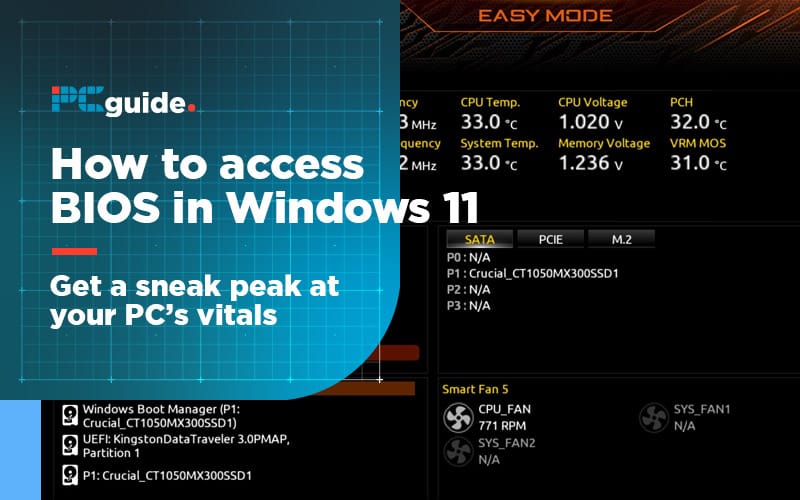
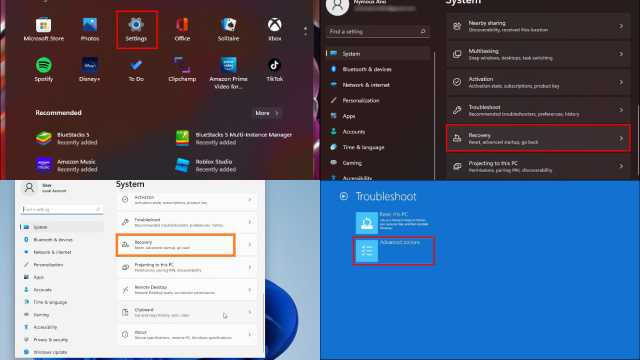
Accessing the BIOS in Windows 11
To access the BIOS settings, you need to enter the BIOS setup utility during the boot process. This is typically done by pressing a specific key or key combination, such as Delete, F2, F10, or Esc, depending on the motherboard manufacturer. The exact key to press is usually displayed on the screen during the initial boot sequence.
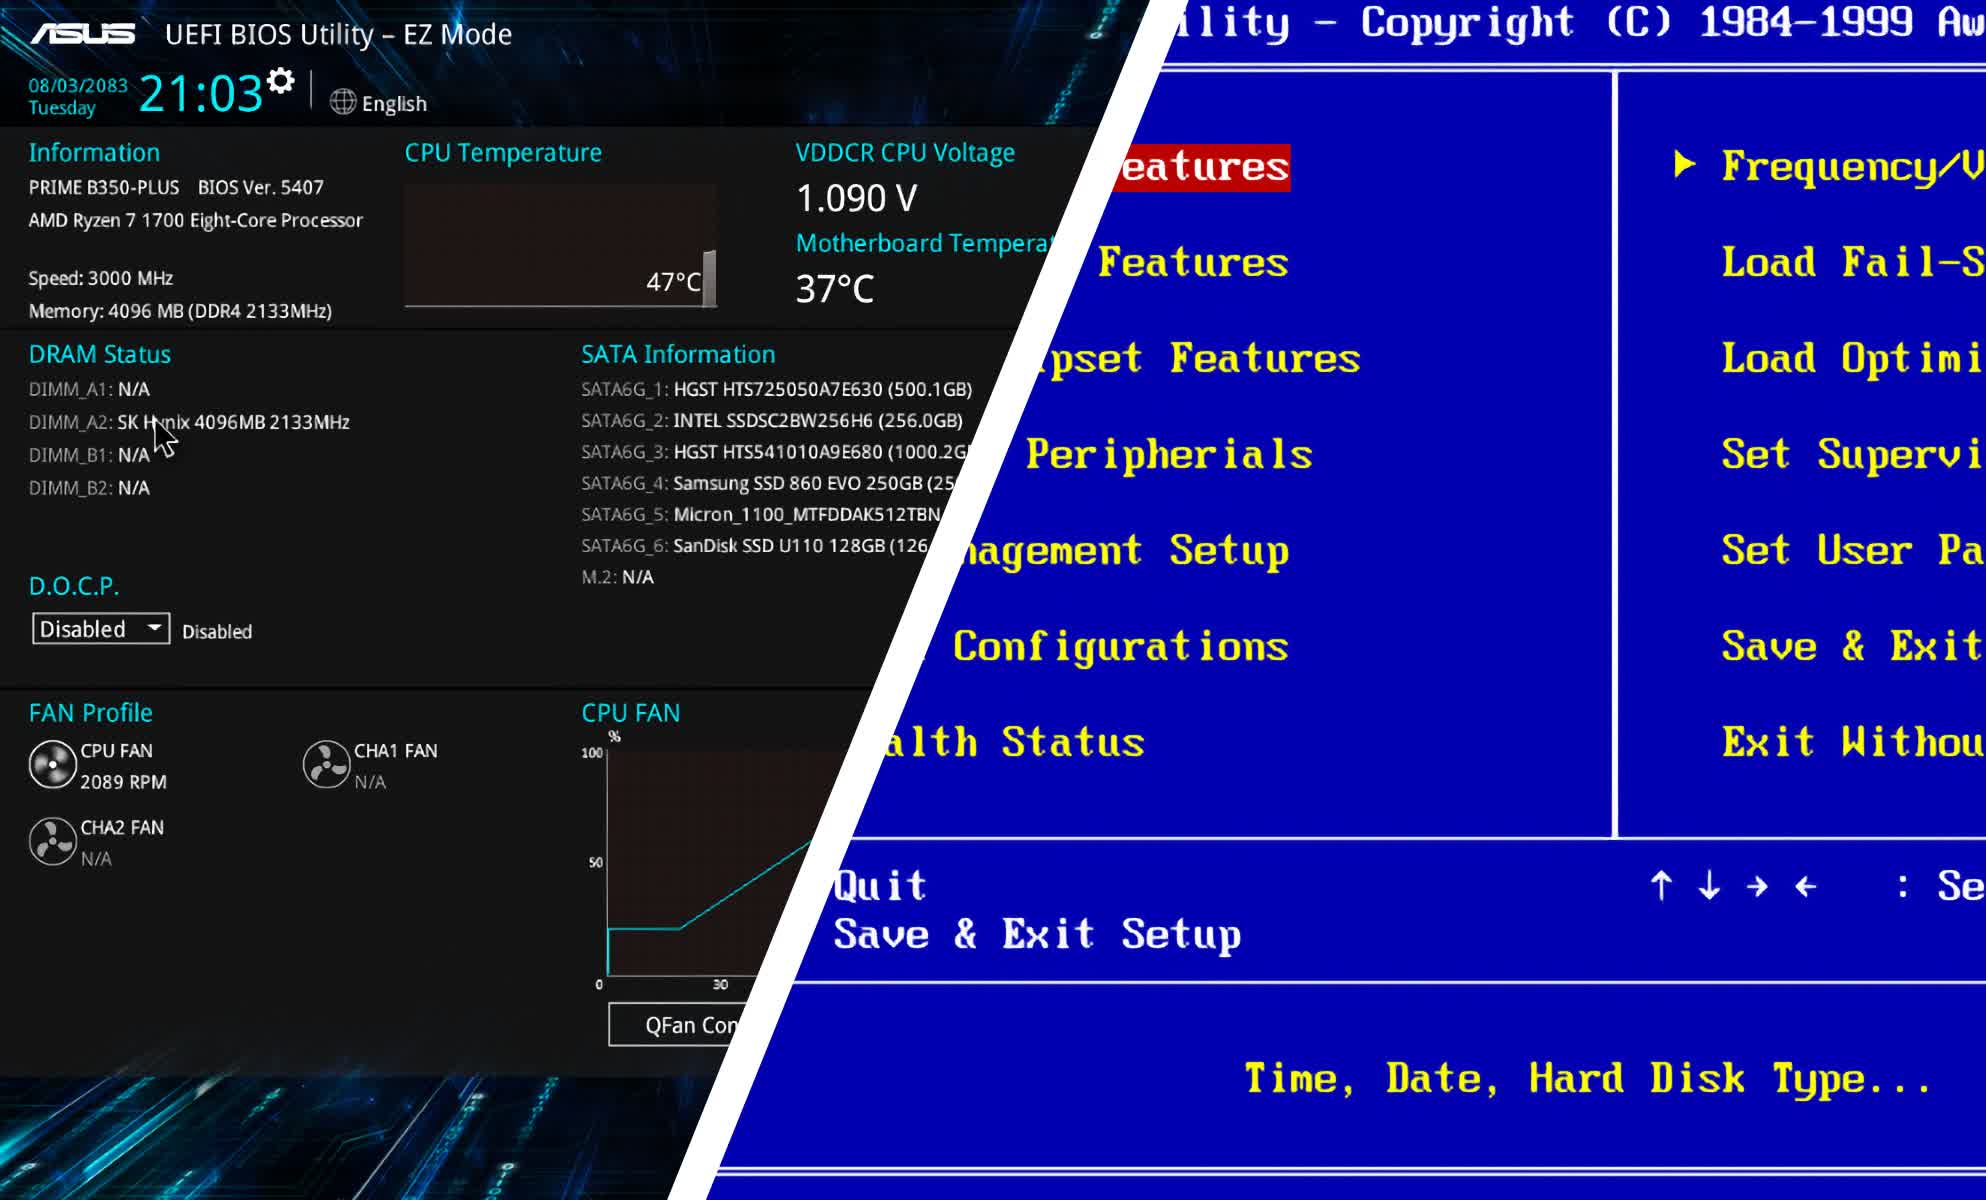
Navigating the BIOS Menu
Once you’ve entered the BIOS, you’ll be presented with a menu-driven interface. The specific layout and options may vary depending on your motherboard manufacturer, but the general structure is usually similar. The main sections you’ll encounter include:
- Main: This section typically displays basic system information, such as the date, time, and boot order.
- Advanced: This section provides access to more advanced settings, including CPU configuration, memory settings, and boot options.
- Boot: This section allows you to manage the boot order, select boot devices, and enable or disable specific boot options.
- Security: This section offers security settings like password protection, boot security, and system integrity checks.
- Exit: This section allows you to save your changes and exit the BIOS setup utility.
Key BIOS Settings for Windows 11
While the BIOS offers a wide range of settings, some are particularly relevant for Windows 11 users:
- Boot Order: Ensure that your Windows 11 installation drive is set as the primary boot device. This ensures that your computer boots directly into Windows 11.
- UEFI Boot Mode: Windows 11 requires UEFI boot mode, which is a more modern and secure boot standard. Ensure that your BIOS is set to UEFI mode for optimal compatibility.
- Secure Boot: This feature helps prevent malicious software from loading during the boot process. It’s generally recommended to enable Secure Boot in the BIOS for enhanced security.
- Fast Boot: This option can speed up the boot process by skipping certain hardware checks. However, it may disable some diagnostic tools.
- XMP Profile: This setting allows you to enable an optimized memory profile, which can improve system performance.
Understanding BIOS Errors
Occasionally, you may encounter errors during the boot process or while navigating the BIOS settings. These errors can be caused by various factors, such as hardware issues, incorrect BIOS settings, or corrupted boot files. Some common BIOS errors include:
- POST Error Codes: These codes appear on the screen during the boot process and indicate a specific hardware issue.
- Boot Errors: These errors occur when the system cannot find a bootable device or when there is a problem with the boot process.
- BIOS Configuration Errors: These errors occur when the BIOS settings are not configured correctly.
Troubleshooting BIOS Issues
If you encounter BIOS errors, you can troubleshoot them using the following steps:
- Check the Hardware: Ensure that all hardware components are properly connected and seated.
- Reset the BIOS to Default Settings: Load the BIOS default settings to rule out any configuration errors.
- Update the BIOS: Update the BIOS to the latest version to fix any known bugs or vulnerabilities.
- Run a Diagnostic Test: Use a diagnostic tool to check for hardware issues.
- Contact the Motherboard Manufacturer: If the problem persists, contact the motherboard manufacturer for support.
FAQs about the BIOS and Windows 11
Q: What is the difference between BIOS and UEFI?
A: UEFI (Unified Extensible Firmware Interface) is a newer and more advanced boot standard that replaces the traditional BIOS. UEFI offers improved security features, faster boot times, and better support for modern hardware. Windows 11 requires UEFI boot mode for optimal compatibility.
Q: How do I update my BIOS?
A: The process for updating the BIOS varies depending on the motherboard manufacturer. You can usually download the latest BIOS update from the manufacturer’s website. However, updating the BIOS is a complex process and should only be attempted by experienced users.
Q: What should I do if I accidentally change a BIOS setting?
A: If you are unsure about a specific BIOS setting, it’s best to leave it at its default value. If you accidentally change a setting and experience problems, you can reset the BIOS to default settings by using the "Load Optimized Defaults" or "Load Defaults" option in the BIOS setup utility.
Q: How can I improve the boot speed of my Windows 11 system?
A: In addition to enabling Fast Boot in the BIOS, you can also improve boot speed by disabling unnecessary startup programs, reducing the number of programs that launch at startup, and using an SSD as your primary boot drive.
Tips for Effective BIOS Navigation
- Read the Documentation: Refer to the motherboard manual for detailed information about the specific BIOS settings and their functions.
- Use the Arrow Keys: Use the arrow keys to navigate through the BIOS menus.
- Press Enter to Select: Press the Enter key to select an option.
- Use the F Keys: Certain F keys may have specific functions within the BIOS, such as saving changes or exiting the BIOS setup utility.
- Be Cautious with Changes: Only change BIOS settings if you are familiar with their purpose and potential consequences.
Conclusion
The BIOS plays a crucial role in the functionality and performance of your Windows 11 system. Understanding its settings and navigating its menu effectively allows you to optimize your system’s performance, enhance security, and troubleshoot issues. While the BIOS may seem intimidating at first, this comprehensive guide provides the necessary information to confidently navigate its features and unlock its full potential for your Windows 11 experience. Remember to approach BIOS settings with caution and always consult the motherboard manual for specific instructions and guidance.

![[2 Methods] How to Access the Windows 11 BIOS?](https://cdn.digitbin.com/wp-content/uploads/How_to_Access_the_Windows_11_BIOS.png)


Closure
Thus, we hope this article has provided valuable insights into Navigating the BIOS for Windows 11: A Comprehensive Guide. We thank you for taking the time to read this article. See you in our next article!