Navigating the BIOS: Accessing the Core of Your Windows 10 Pro System
Related Articles: Navigating the BIOS: Accessing the Core of Your Windows 10 Pro System
Introduction
In this auspicious occasion, we are delighted to delve into the intriguing topic related to Navigating the BIOS: Accessing the Core of Your Windows 10 Pro System. Let’s weave interesting information and offer fresh perspectives to the readers.
Table of Content
Navigating the BIOS: Accessing the Core of Your Windows 10 Pro System
The BIOS, or Basic Input/Output System, is the fundamental software that initializes your computer’s hardware and prepares it for the operating system. While often unseen and unheard, it plays a crucial role in the smooth operation of your Windows 10 Pro system. Accessing the BIOS allows you to make critical adjustments to your system’s configuration, influencing how your hardware functions and interacts with your operating system.
The Importance of BIOS Access
Understanding and navigating the BIOS is essential for various reasons:
- Hardware Configuration: The BIOS provides a platform to modify settings related to your computer’s components. This includes adjusting boot priorities, enabling or disabling specific hardware devices, and fine-tuning performance parameters.
- Troubleshooting Issues: When encountering system-level problems, the BIOS can be invaluable for troubleshooting. It allows you to check hardware functionality, diagnose boot errors, and potentially isolate the source of the issue.
- System Security: The BIOS offers security features like password protection, secure boot settings, and Trusted Platform Module (TPM) configuration, which can enhance your system’s overall security posture.
- Overclocking and Advanced Settings: For advanced users, the BIOS provides access to advanced settings, including overclocking options, which can be used to optimize performance and unlock the full potential of your hardware.
Methods to Access the BIOS
Accessing the BIOS on a Windows 10 Pro system typically involves pressing a specific key or key combination during the boot process. However, the exact method can vary depending on the manufacturer of your motherboard. Here are some common approaches:
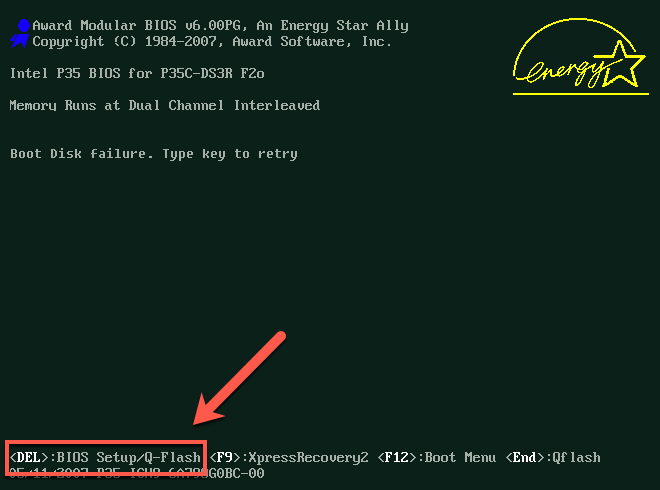
1. The Boot Menu:
- Press the designated key: Most manufacturers utilize keys like F2, F10, F11, F12, Delete, or Esc to access the BIOS or boot menu. The specific key is usually displayed on the screen during the initial boot sequence.
- Navigate to the BIOS: Within the boot menu, look for an option labelled "BIOS Setup," "System Setup," or "CMOS Setup." Select this option to enter the BIOS interface.
2. Using the System Configuration (MSConfig):
- Open System Configuration: Search for "msconfig" in the Windows search bar and press Enter.
- Access Boot Settings: Navigate to the "Boot" tab within the System Configuration window.
- Enable BIOS Access: Check the "Safe Boot" option and select the "Minimal" setting. This will allow you to access the BIOS during the next reboot.
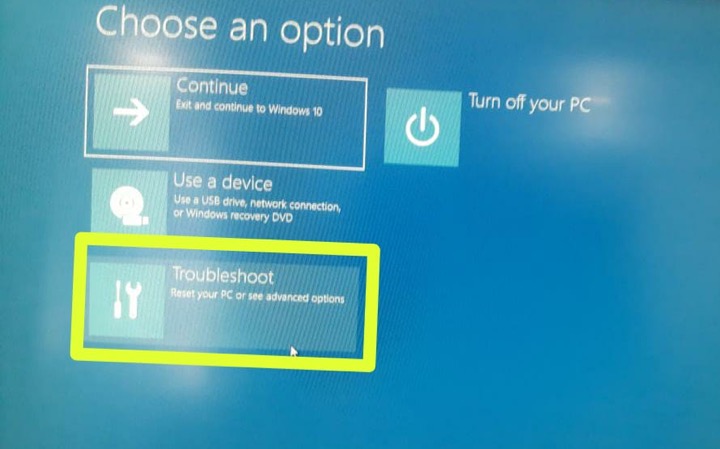
3. Using the UEFI Firmware Settings:
- Access UEFI Firmware Settings: In Windows 10 Pro, navigate to "Settings" > "Update & Security" > "Recovery."
- Select Advanced Startup: Click on "Restart now" under the "Advanced startup" section.
- Access UEFI Firmware Settings: Choose "Troubleshoot" > "Advanced options" > "UEFI Firmware Settings." This will restart your system and take you directly to the BIOS interface.
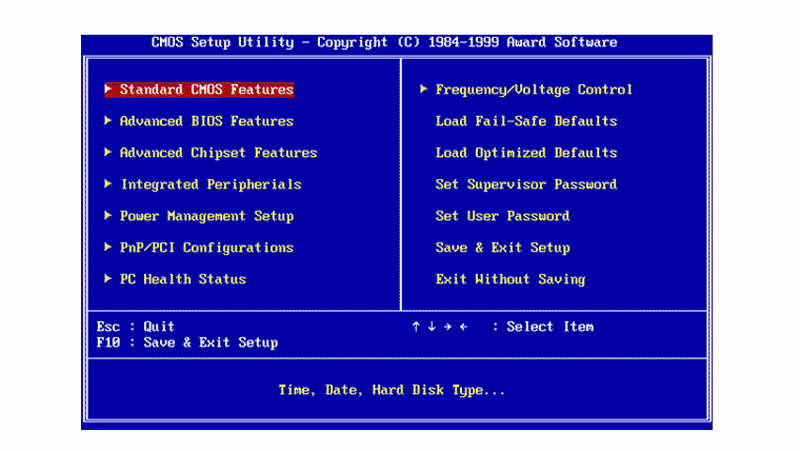
Navigating the BIOS Interface
Once you’ve successfully entered the BIOS, you’ll be presented with a menu-driven interface. The layout and options within the BIOS can vary significantly depending on your motherboard manufacturer. However, most BIOS interfaces share common elements:
- Main Menu: The main menu provides access to the primary BIOS settings, including boot options, system information, and hardware configuration.
- Sub-Menus: Each main menu item often leads to sub-menus with more specific settings related to the selected category.
- Navigation Keys: Use the arrow keys to navigate through the menus and select options.
- Enter/Return Key: Press the Enter key to confirm selections and enter sub-menus.
- Esc Key: Use the Esc key to exit menus and return to the previous level.
- F10 Key: Often used to save changes and exit the BIOS.
- Help Menu: Some BIOS interfaces include a help menu that provides brief explanations of the various settings.
Common BIOS Settings and Their Importance:
- Boot Order: This setting determines the sequence in which your computer searches for bootable devices (hard drives, USB drives, optical drives). You can prioritize the boot order to ensure your system starts from the desired device.
- System Time and Date: Configure the system’s time and date settings.
- CPU Settings: Adjust settings related to your processor, including overclocking options, core ratios, and voltage levels.
- Memory Settings: Configure memory timings, voltage, and other parameters to optimize performance.
- Storage Settings: Manage storage devices, including hard drives, SSDs, and optical drives.
- Network Settings: Configure network settings, such as boot from network, network card settings, and Wake-on-LAN.
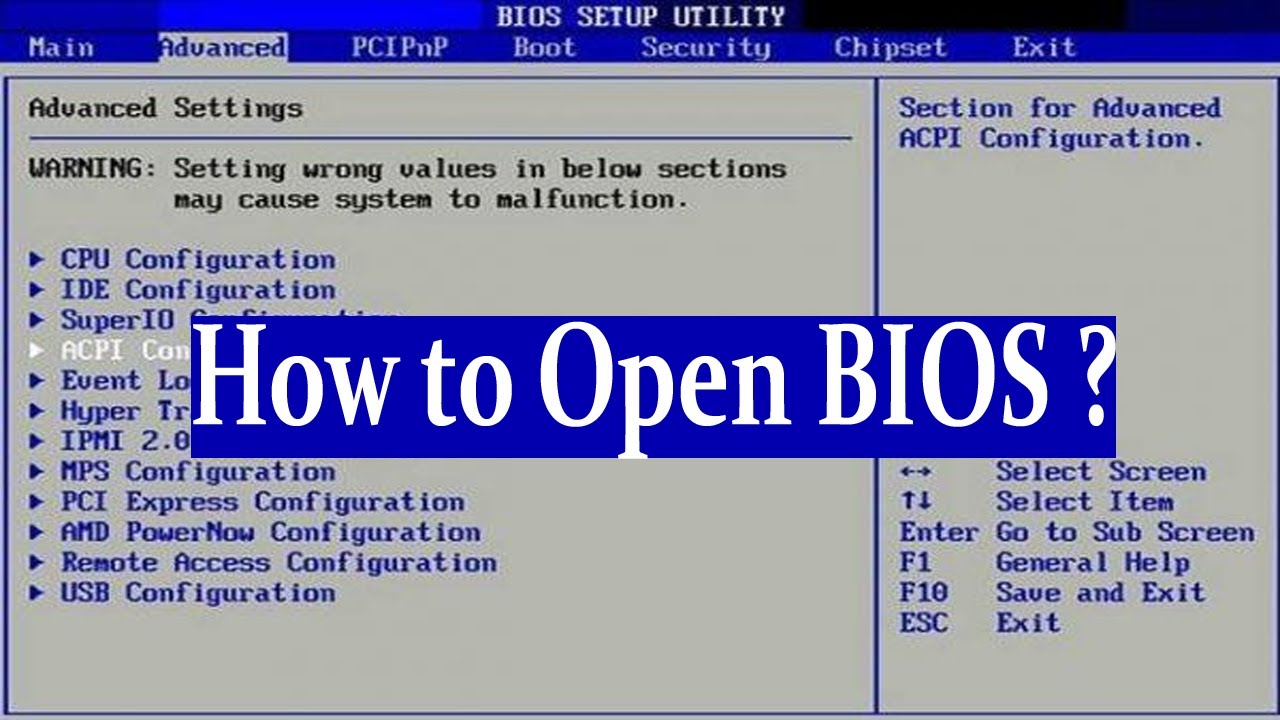
- Security Settings: Set passwords, enable secure boot, configure TPM, and manage other security features.
- Advanced Settings: Access advanced settings for specific components, such as graphics card settings, audio settings, and system monitoring options.
Tips for Navigating the BIOS:
- Read the Documentation: Consult the motherboard manual or manufacturer website for detailed explanations of each BIOS setting.
- Start with Default Settings: When unsure about a setting, revert to the default values first.
- Make Changes Gradually: Avoid making multiple significant changes at once. Instead, test each setting individually to ensure stability.
- Save and Exit Carefully: Always save your changes before exiting the BIOS to ensure they are applied.
- Be Cautious with Overclocking: Overclocking can increase performance but also carries the risk of instability and hardware damage. Proceed with caution and consult resources for proper guidance.
FAQs about Accessing and Using the BIOS:
Q: What happens if I make a mistake in the BIOS settings?
A: If you make a mistake in the BIOS settings, your system may not boot properly or experience performance issues. You can usually revert to the default settings by selecting the "Load Optimized Defaults" or "Load Setup Defaults" option within the BIOS.
Q: Is it safe to change BIOS settings?
A: While the BIOS is a powerful tool, it’s generally safe to make changes as long as you understand the implications of each setting. Always consult the documentation and proceed with caution, especially when dealing with overclocking or advanced settings.
Q: Why can’t I access the BIOS on my computer?
A: If you can’t access the BIOS, it could be due to a hardware issue, a faulty keyboard, or a BIOS password. Consult your motherboard manual or contact the manufacturer for support.
Q: How often should I access the BIOS?
A: You don’t need to access the BIOS frequently. It’s typically only necessary when making configuration changes, troubleshooting issues, or upgrading hardware.
Conclusion:
Accessing the BIOS is a crucial skill for any Windows 10 Pro user. It allows you to customize your system’s hardware settings, troubleshoot problems, enhance security, and potentially unlock advanced performance options. By understanding the importance of the BIOS, the methods to access it, and the various settings available, you can gain greater control over your Windows 10 Pro system and ensure it operates at its best.


:max_bytes(150000):strip_icc()/A6-EnterBIOSonWindows10-annotated-f1bbfee62f254fdf81252e354ebf7e9a.jpg)
.png?width=1556u0026name=Screenshot%20(33).png)
Closure
Thus, we hope this article has provided valuable insights into Navigating the BIOS: Accessing the Core of Your Windows 10 Pro System. We thank you for taking the time to read this article. See you in our next article!