Navigating Administrative Privileges in Windows 11: A Comprehensive Guide
Related Articles: Navigating Administrative Privileges in Windows 11: A Comprehensive Guide
Introduction
With enthusiasm, let’s navigate through the intriguing topic related to Navigating Administrative Privileges in Windows 11: A Comprehensive Guide. Let’s weave interesting information and offer fresh perspectives to the readers.
Table of Content
Navigating Administrative Privileges in Windows 11: A Comprehensive Guide
Windows 11, like its predecessors, employs a tiered system of user accounts, each with varying levels of access and control. This structure is designed to safeguard system stability and prevent unintentional changes that could compromise the operating system’s integrity. At the apex of this hierarchy lies the "Administrator" account, possessing the highest level of privileges and the ability to make fundamental changes to the system.
Understanding the Importance of Administrative Access
The Administrator account is the key to managing and customizing Windows 11. It grants access to critical system functions, including:
- Installing and Uninstalling Software: Administrators can install and remove programs, including system-level applications, without limitations.
- Configuring System Settings: They have complete control over system settings, such as network configurations, security policies, and user account management.
- Making Changes to System Files: Administrators can modify system files, including those essential for Windows 11’s operation, allowing for advanced troubleshooting and customization.
- Managing User Accounts: They can create, modify, and delete user accounts, granting or restricting privileges as needed.
- Running System Tasks: Administrators can execute tasks requiring elevated privileges, such as troubleshooting system errors and configuring hardware.
Methods to Access Administrative Privileges
Windows 11 offers multiple methods for accessing administrative privileges, each catering to different scenarios and user preferences:
1. The Built-in Administrator Account:
Windows 11 includes a default Administrator account, typically disabled for security reasons. This account offers the highest level of privileges and is often used during initial system setup or for troubleshooting.
-
Enabling the Built-in Administrator Account:
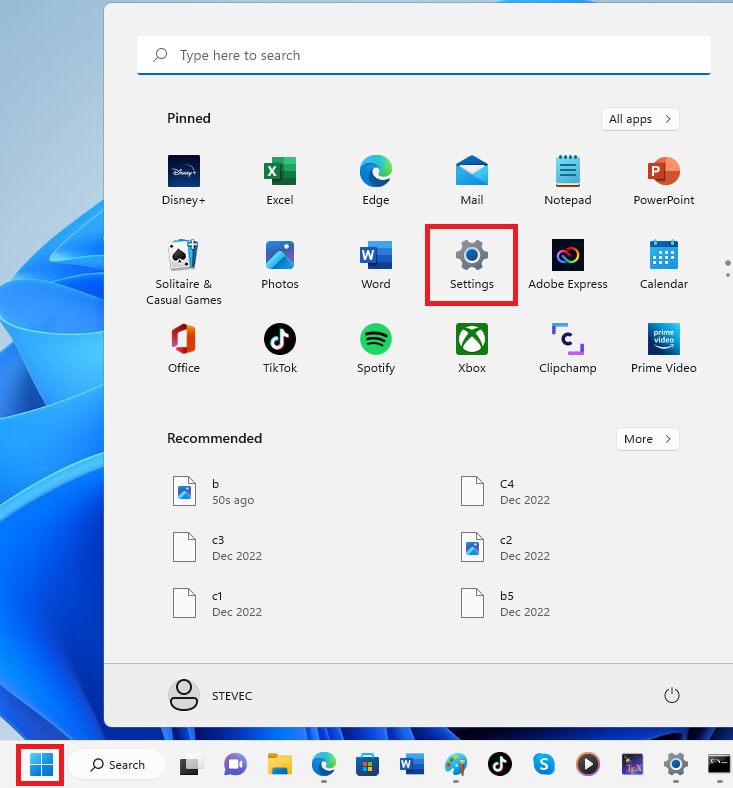
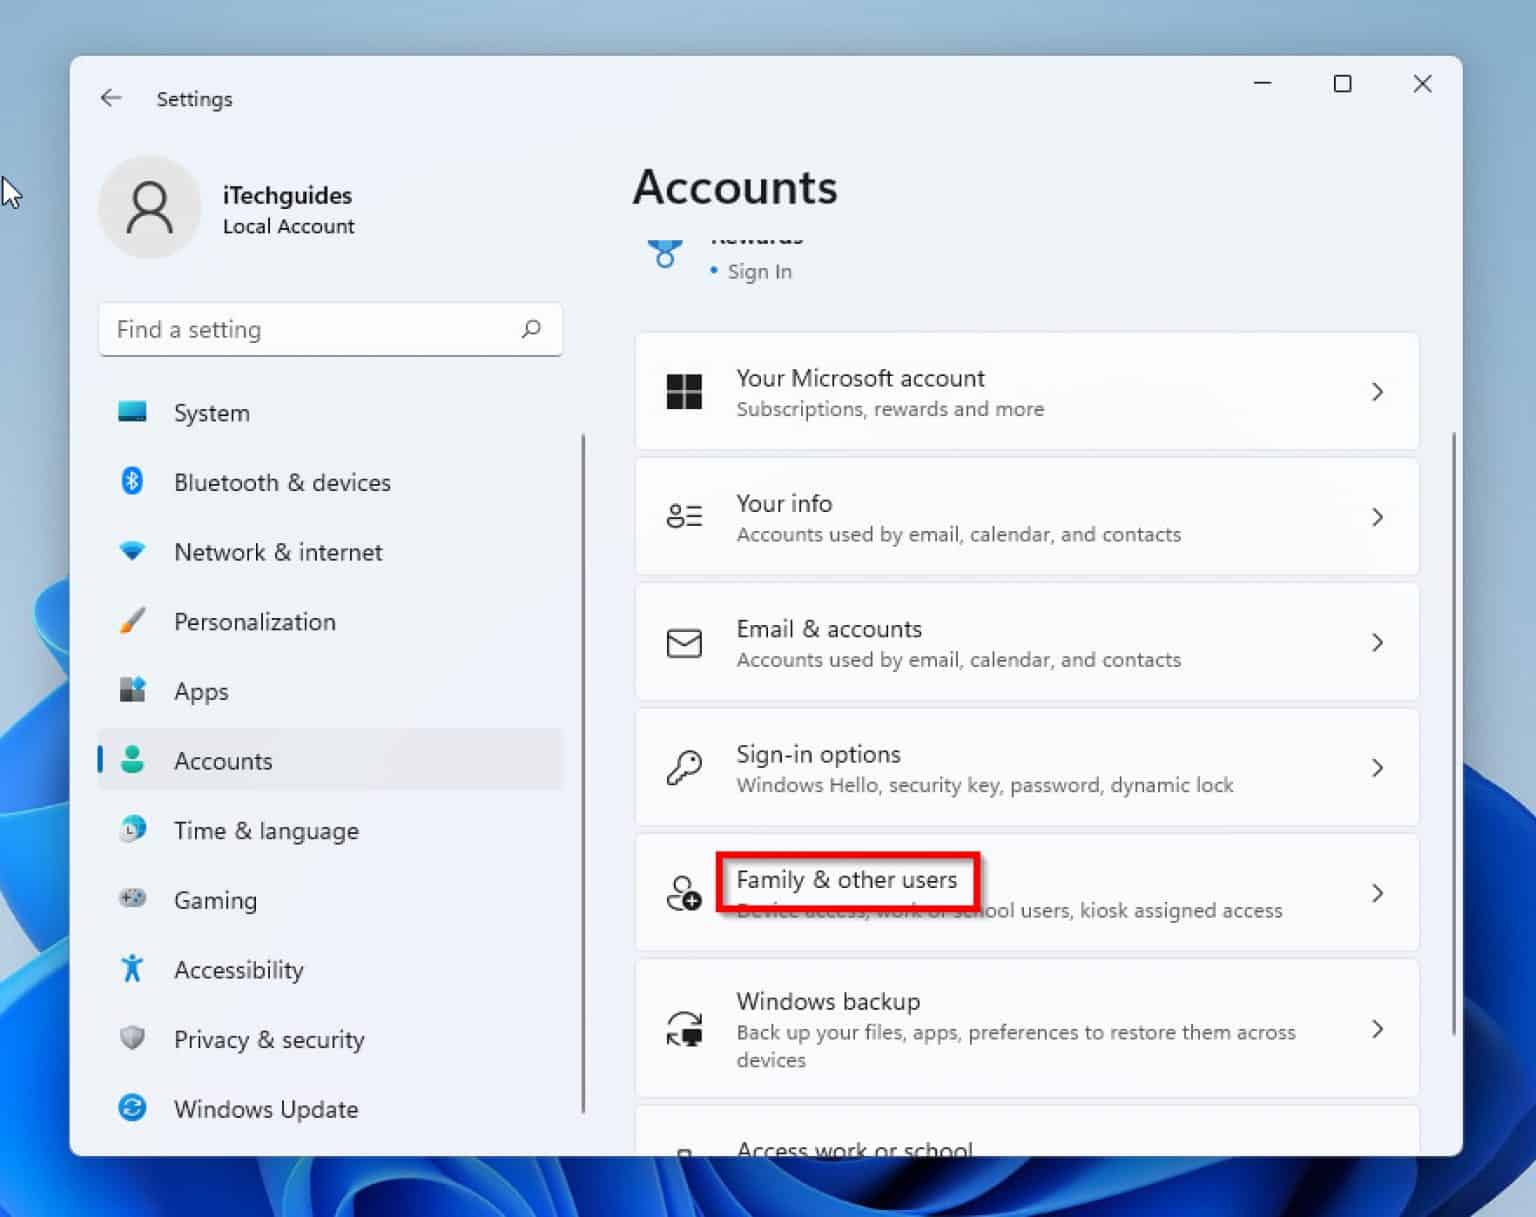
- Open "Settings" by pressing Windows key + I.
- Navigate to "Accounts" > "Family & other users".
- Click "Add someone else to this PC".
- Choose "I don’t have this person’s sign-in information".
- Select "Add a user without a Microsoft account".
- Enter a username and password for the Administrator account.
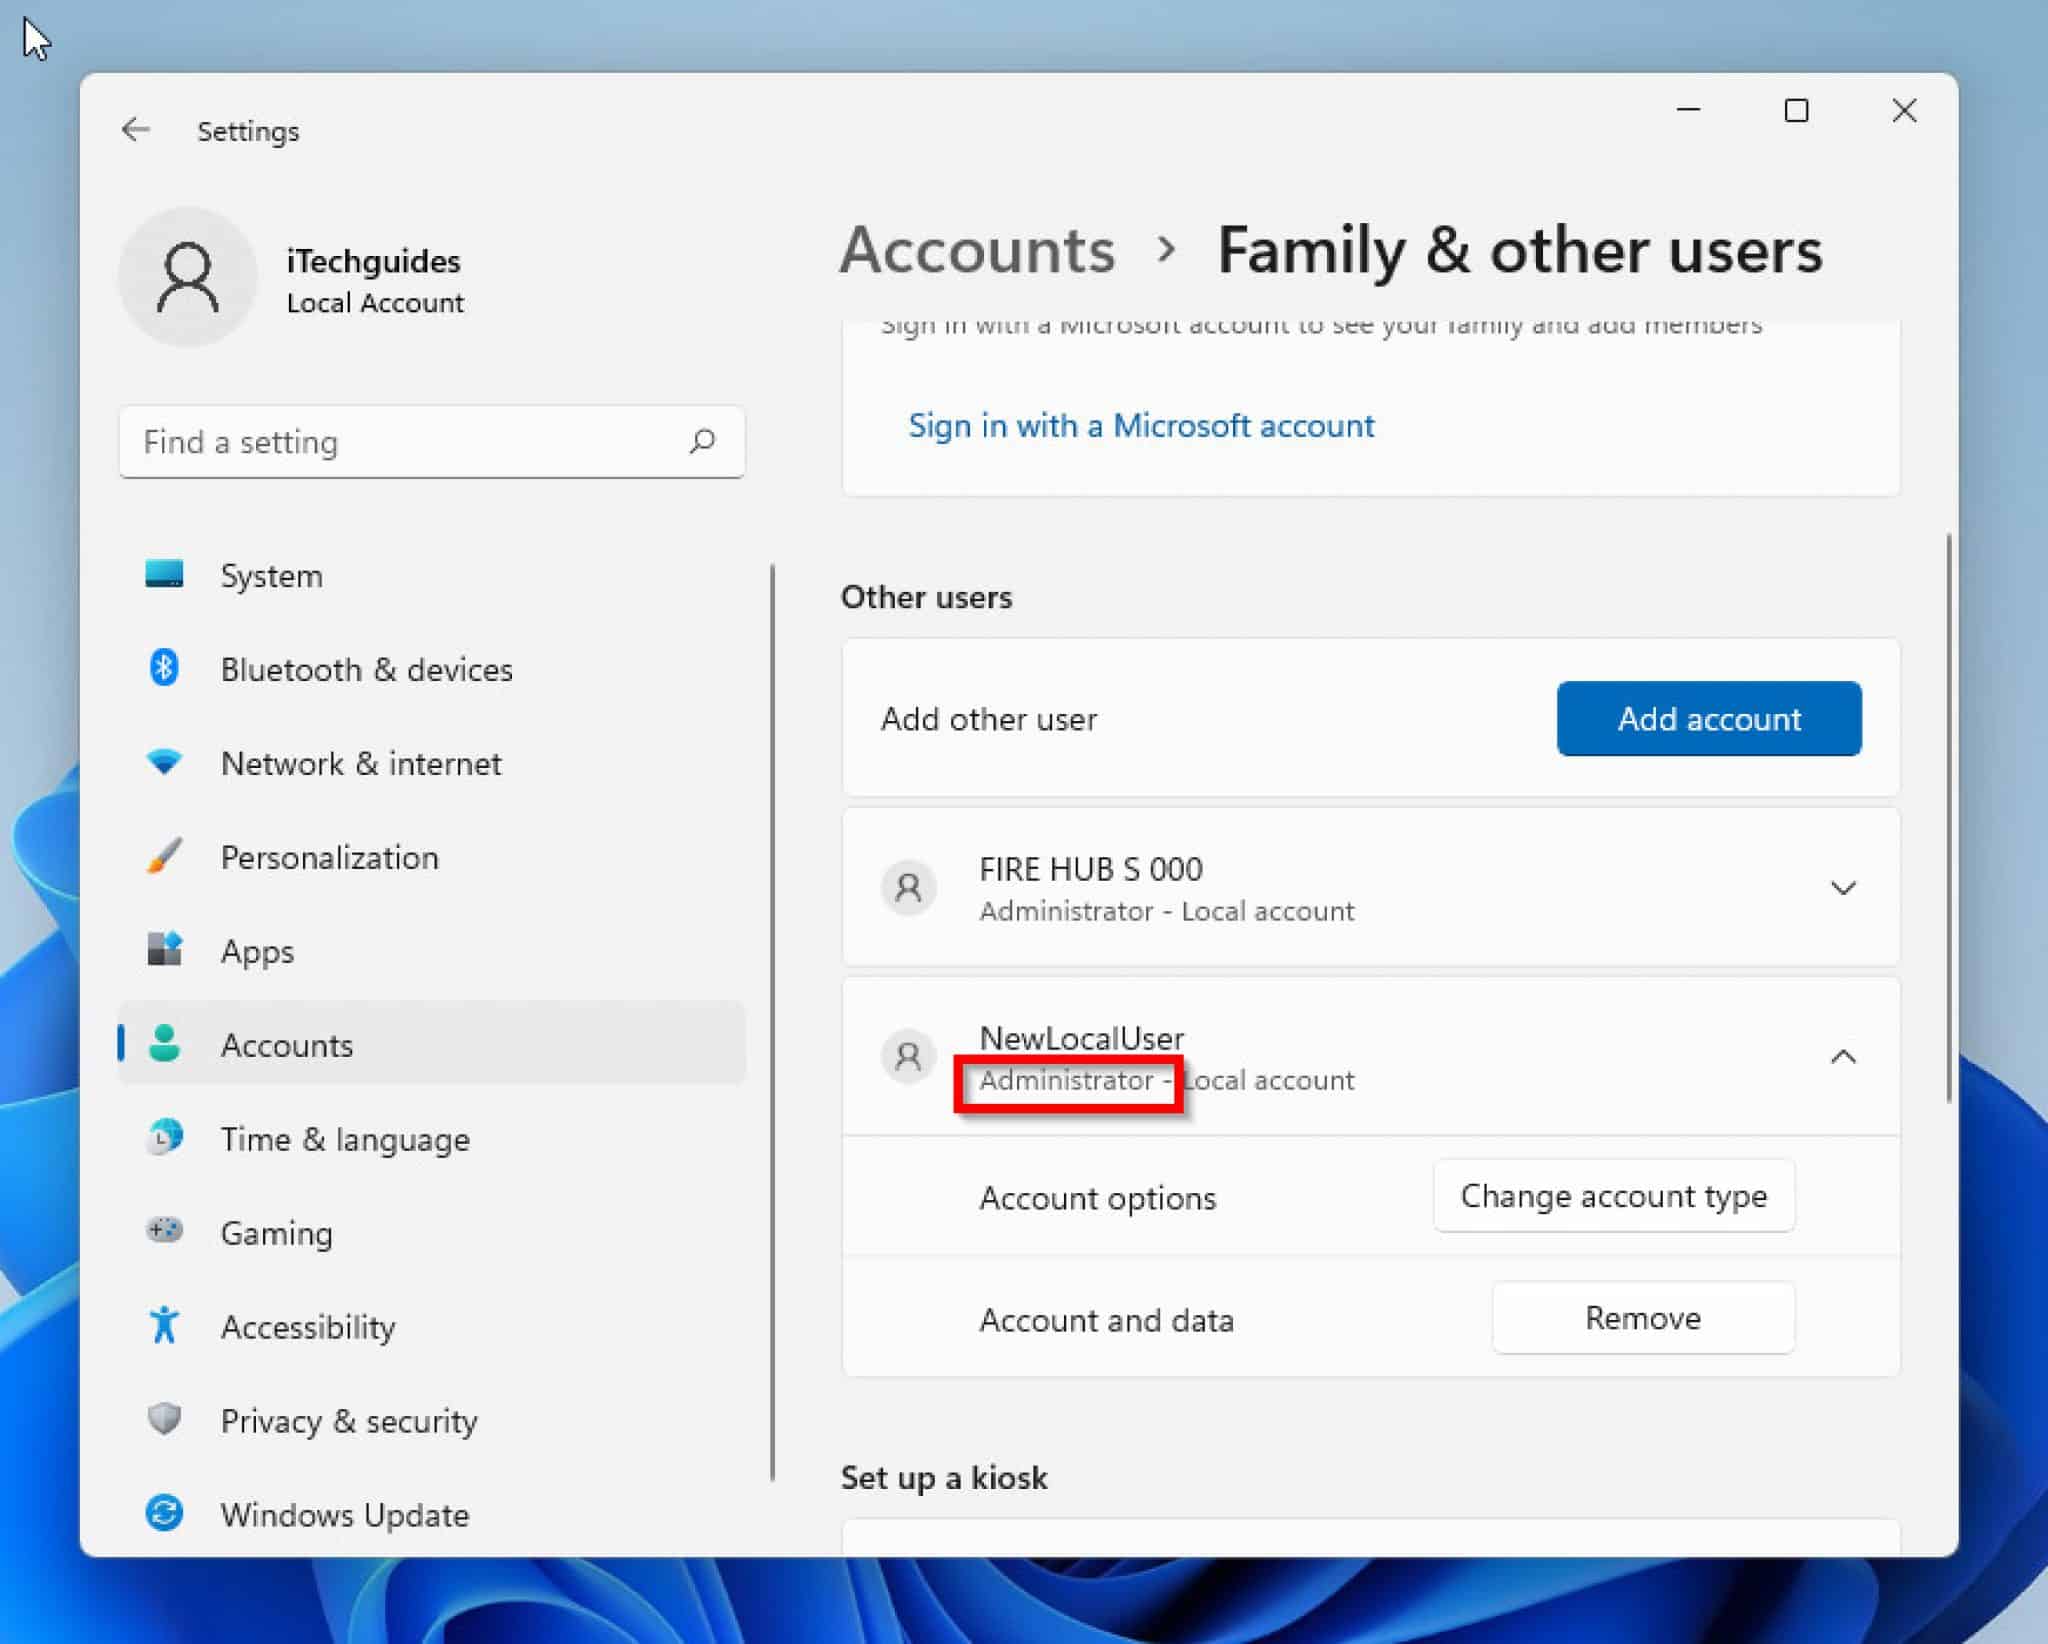
- Once created, right-click on the newly created Administrator account and select "Change account type".
- Select "Administrator" and click "OK".
2. Using the "Run as Administrator" Option:
This method allows you to temporarily elevate the privileges of specific applications or tasks without needing to log in as a full Administrator.
-
Accessing "Run as Administrator":
- Right-click on the application or shortcut you wish to run with elevated privileges.
- Select "Run as administrator".
- Enter your current user’s password if prompted.
3. Using the "Command Prompt" or "PowerShell" with Administrative Privileges:
These command-line interfaces provide a powerful tool for managing Windows 11. You can launch them with administrative privileges to execute commands that require elevated access.
-
Launching Command Prompt or PowerShell with Administrative Privileges:
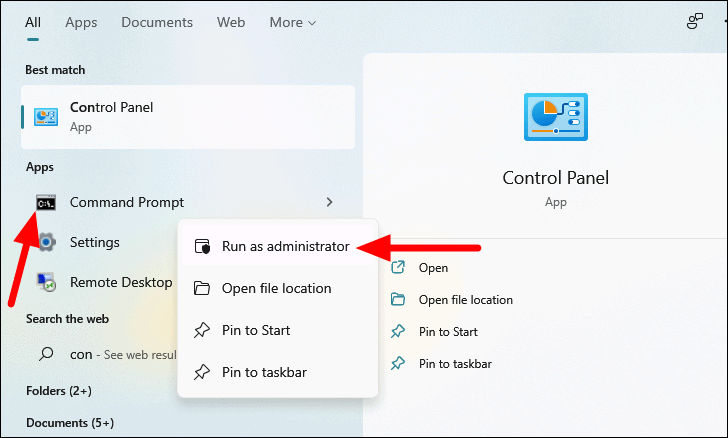
- Search for "cmd" or "powershell" in the Windows search bar.
- Right-click on the result and select "Run as administrator".
4. Utilizing the "Net User" Command:
This command-line tool allows you to manage user accounts, including granting or revoking administrative privileges.
-
Granting Administrative Privileges using "Net User":
- Open "Command Prompt" or "PowerShell" with administrative privileges.
- Execute the command:
net user <username> /add(replace<username>with the desired username). - Execute the command:
net localgroup Administrators <username> /add(replace<username>with the desired username).
5. Creating a Standard User Account with Administrative Privileges:
While not recommended for security reasons, you can create a standard user account with administrative privileges.
-
Creating a Standard User Account with Administrative Privileges:
- Open "Settings" by pressing Windows key + I.
- Navigate to "Accounts" > "Family & other users".
- Click "Add someone else to this PC".
- Follow the steps to create a new user account.
- Right-click on the newly created account and select "Change account type".
- Select "Administrator" and click "OK".
Security Considerations
It’s crucial to understand the security implications of granting administrative privileges. While necessary for system management, excessive use can pose risks:
- Malicious Software: Administrators have access to critical system files, making them vulnerable to malware that can exploit these privileges to gain control of the system.
- Accidental Changes: Unintentional modifications by an administrator can lead to system instability or data loss.
- Compromised Accounts: If an administrator account is compromised, attackers can gain full control of the system.
Best Practices for Administrative Access
To mitigate these risks, adhere to these best practices:
- Limit Administrative Usage: Minimize the time spent logged in as an administrator. Use standard user accounts for everyday tasks and switch to administrator privileges only when necessary.
- Strong Passwords: Use complex and unique passwords for all administrator accounts, including the built-in Administrator account.
- Regular Password Changes: Change administrator passwords frequently to prevent unauthorized access.
- Enable Two-Factor Authentication: Implement two-factor authentication for administrator accounts to add an extra layer of security.
- Keep Software Updated: Ensure all system software, including operating system updates and antivirus software, are up-to-date to patch security vulnerabilities.
- Monitor System Activity: Regularly review system logs to detect suspicious activity that might indicate unauthorized access or malware infection.
FAQs on Accessing Administrative Privileges in Windows 11
1. What happens if I forget the administrator password?
If you forget the administrator password, you may need to reset it using a recovery drive or a password reset disk. However, if you do not have either, you may need to reinstall Windows 11, which will erase all data on the drive.
2. Can I create multiple administrator accounts?
Yes, you can create multiple administrator accounts. However, it is generally recommended to limit the number of administrator accounts to reduce security risks.
3. What is the difference between a standard user and an administrator?
A standard user has limited privileges and cannot make changes to system settings or install software without administrator permission. An administrator has full control over the system and can perform any action.
4. Is it safe to use the built-in Administrator account?
The built-in Administrator account offers the highest level of privileges, making it a target for malicious software. It is generally recommended to disable the built-in Administrator account and use a standard user account for everyday tasks.
5. Can I change the administrator account name?
You cannot directly change the name of the built-in Administrator account. However, you can rename a standard user account with administrative privileges.
Tips for Effective Administrative Access Management
- Create a Dedicated Administrative Account: Instead of using the built-in Administrator account, create a dedicated administrative account for system management tasks. This helps isolate administrative access from everyday usage.
- Use the "Run as Administrator" Option When Necessary: Avoid logging in as an administrator for routine tasks. Utilize the "Run as Administrator" option for specific applications or tasks requiring elevated privileges.
- Enable User Account Control (UAC): UAC prompts you for confirmation before making significant system changes, providing an extra layer of protection against unauthorized modifications.
- Regularly Review System Permissions: Periodically review system permissions to ensure that only authorized users have access to sensitive files and folders.
- Implement a Strong Password Policy: Enforce a strict password policy for all user accounts, including administrators, requiring complex passwords and regular changes.
Conclusion
Understanding and effectively managing administrative privileges in Windows 11 is crucial for maintaining system security and stability. By adhering to best practices, limiting administrative access, and implementing robust security measures, you can protect your system from unauthorized access and potential threats. While administrative privileges offer powerful control over the system, responsible usage and a proactive approach to security are essential for a secure and efficient Windows 11 experience.


Closure
Thus, we hope this article has provided valuable insights into Navigating Administrative Privileges in Windows 11: A Comprehensive Guide. We hope you find this article informative and beneficial. See you in our next article!