Installing Windows 11 on Older PCs: A Comprehensive Guide
Related Articles: Installing Windows 11 on Older PCs: A Comprehensive Guide
Introduction
With great pleasure, we will explore the intriguing topic related to Installing Windows 11 on Older PCs: A Comprehensive Guide. Let’s weave interesting information and offer fresh perspectives to the readers.
Table of Content
Installing Windows 11 on Older PCs: A Comprehensive Guide

While Windows 11 boasts a modern interface and improved performance, its system requirements can pose a challenge for older PCs. However, with careful planning and a few adjustments, it is possible to install Windows 11 on a computer that may not meet the official minimum specifications. This guide provides a comprehensive overview of the process, addressing potential hurdles and offering solutions to ensure a smooth installation.
Understanding Windows 11 System Requirements
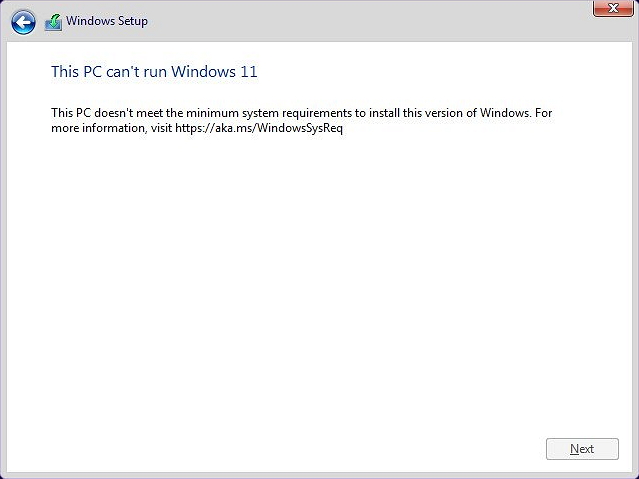
Before attempting to install Windows 11, it is crucial to understand the official system requirements. These requirements are designed to ensure optimal performance and compatibility. While it is possible to install Windows 11 on a computer that does not meet these requirements, it may lead to instability or performance issues.
Minimum System Requirements for Windows 11:
- Processor: 1 gigahertz (GHz) or faster with 2 or more cores
- RAM: 4 gigabytes (GB)
- Storage: 64 GB or larger storage device
- System Firmware: UEFI, Secure Boot capable
- Graphics Card: Compatible with DirectX 12 or later, WDDM 2.x driver
- Display: High Definition (720p) display, 9 inches or larger
Circumventing the Minimum Requirements:
While older PCs may not meet all the requirements, there are methods to bypass certain restrictions. These methods involve modifying system settings or using workarounds to enable installation. However, it is important to note that these methods may not guarantee optimal performance or stability.
1. Bypassing the TPM 2.0 Requirement:
The Trusted Platform Module (TPM) 2.0 is a security feature that is mandatory for Windows 11. Older PCs may not have a TPM 2.0 chip or may have it disabled in the BIOS settings. To bypass this requirement, you can:
- Enable TPM 2.0 in the BIOS: If your motherboard supports TPM 2.0, you can enable it in the BIOS settings. This will require accessing the BIOS menu during boot-up and navigating to the security or advanced settings.
- Use a Registry Hack: A registry hack can be used to bypass the TPM 2.0 check during installation. However, this is not recommended as it may compromise security.
2. Bypassing the Processor Requirement:
Windows 11 requires a processor that supports specific instructions. Older processors may not meet this requirement. To bypass this restriction, you can:
- Use a Registry Hack: A registry hack can be used to bypass the processor check during installation. However, this is not recommended as it may lead to performance issues.
- Upgrade the Processor: If possible, upgrading the processor to a compatible model is the most reliable solution.
3. Bypassing the Memory Requirement:
While 4GB of RAM is the minimum requirement, older PCs may have less RAM. To bypass this restriction, you can:
- Upgrade the RAM: If possible, upgrading the RAM to 4GB or more is the most reliable solution.
- Use a Lightweight Operating System: Consider using a lightweight operating system like Linux or a stripped-down version of Windows 10.
4. Bypassing the Storage Requirement:
Windows 11 requires at least 64GB of storage space. Older PCs may have less storage space. To bypass this restriction, you can:
- Upgrade the Storage: If possible, upgrading the storage to a larger SSD or HDD is the most reliable solution.
- Use a Smaller Installation: Consider installing a smaller version of Windows 11, such as the Home edition, or removing unnecessary features and applications.
Preparing for Installation:
Once you have addressed the system requirements, it is important to prepare for the installation. This involves:
- Backing Up Data: Before installing Windows 11, it is essential to back up all important data. This can be done using external hard drives, cloud storage services, or data backup software.
- Creating a Bootable USB Drive: The Windows 11 installation files can be downloaded from the Microsoft website. These files need to be copied to a bootable USB drive, which will be used to start the installation process.
- Disabling Antivirus Software: Antivirus software can sometimes interfere with the installation process. It is recommended to temporarily disable antivirus software before starting the installation.
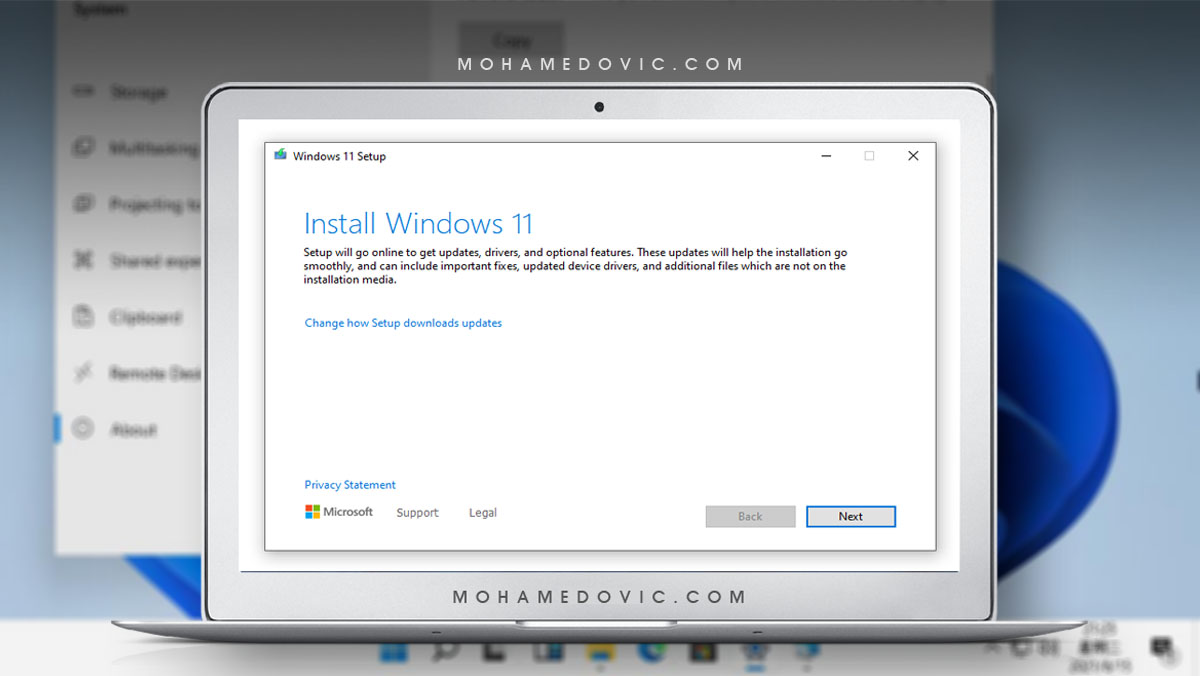
Installing Windows 11 on an Older PC:
Once the preparation is complete, you can proceed with the installation. The installation process is similar to installing any other version of Windows.
- Boot from the USB Drive: Insert the bootable USB drive into the PC and restart it. Press the appropriate key (usually F12 or F10) to access the boot menu and select the USB drive as the boot device.
- Start the Installation: The Windows 11 installation wizard will appear. Follow the on-screen instructions to select the language, time zone, and keyboard layout.
- Install Windows 11: The installation process will start. This may take some time depending on the speed of your PC.
- Activate Windows 11: Once the installation is complete, you will need to activate Windows 11. You can use a product key or activate it online using your Microsoft account.
Post-Installation Configuration:
After installing Windows 11, it is important to configure the operating system. This includes:
- Installing Drivers: The necessary drivers for your hardware, such as the graphics card, sound card, and network adapter, may need to be installed manually.
- Updating Windows: It is recommended to update Windows 11 to the latest version to ensure security and stability.
- Installing Applications: Install the necessary applications, such as web browsers, office suites, and security software.
Troubleshooting Installation Issues:
If you encounter any issues during the installation process, you can try the following:
- Check System Requirements: Ensure that your PC meets the minimum system requirements for Windows 11.
- Disable Antivirus Software: Temporarily disable antivirus software to prevent conflicts.
- Use a Different USB Drive: Try using a different USB drive to create the bootable installation media.
- Run a System Check: Run a system check to identify any hardware or software issues.
- Consult Microsoft Support: Contact Microsoft support for assistance if you are unable to resolve the issue.
Conclusion:
Installing Windows 11 on an older PC can be a challenging process, but it is achievable with careful planning and the right approach. By understanding the system requirements, circumventing potential roadblocks, and following the steps outlined in this guide, you can successfully install Windows 11 on your older PC. Remember to back up your data, use a bootable USB drive, and install necessary drivers and updates. While performance may be less than optimal, installing Windows 11 can breathe new life into your older computer.


Closure
Thus, we hope this article has provided valuable insights into Installing Windows 11 on Older PCs: A Comprehensive Guide. We thank you for taking the time to read this article. See you in our next article!