Clearing the Clutter: How to Delete Temporary Files in Windows 11
Related Articles: Clearing the Clutter: How to Delete Temporary Files in Windows 11
Introduction
With enthusiasm, let’s navigate through the intriguing topic related to Clearing the Clutter: How to Delete Temporary Files in Windows 11. Let’s weave interesting information and offer fresh perspectives to the readers.
Table of Content
- 1 Related Articles: Clearing the Clutter: How to Delete Temporary Files in Windows 11
- 2 Introduction
- 3 Clearing the Clutter: How to Delete Temporary Files in Windows 11
- 3.1 Understanding the Importance of Deleting Temporary Files
- 3.2 Methods for Deleting Temporary Files in Windows 11
- 3.3 Frequently Asked Questions (FAQs)
- 3.4 Tips for Deleting Temporary Files in Windows 11
- 3.5 Conclusion
- 4 Closure
Clearing the Clutter: How to Delete Temporary Files in Windows 11
Windows 11, like its predecessors, generates temporary files during everyday operations. These files, often referred to as "temp files," serve as temporary storage for data used by applications and the operating system itself. While necessary for smooth functioning, these files can accumulate over time, leading to a cluttered system and potential performance issues. Regularly deleting temporary files can contribute to a more efficient and responsive computer.
Understanding the Importance of Deleting Temporary Files
Temporary files are essential for smooth system operation. They hold data that applications need for quick access, enabling faster processing and smoother execution. However, their temporary nature implies they are not always required. When an application finishes its task, the associated temporary files are often left behind, taking up valuable disk space.
Deleting these files offers several advantages:
- Freeing up disk space: Accumulated temporary files can occupy significant disk space, especially for users with limited storage. Removing them can create space for new files and applications, improving overall system performance.
- Enhancing system performance: A cluttered system with a multitude of temporary files can experience slower boot times, sluggish application loading, and reduced overall responsiveness. Regularly deleting these files can significantly improve system performance.
- Improving security: Some temporary files might contain sensitive information, such as passwords or browsing history. Deleting them helps minimize potential security risks and protects sensitive data.
- Optimizing system stability: The presence of outdated or corrupted temporary files can sometimes lead to system instability and crashes. Removing them ensures a cleaner and more stable system environment.
Methods for Deleting Temporary Files in Windows 11
Several methods allow users to delete temporary files in Windows 11. These methods vary in their scope and complexity, offering options for both casual and advanced users.
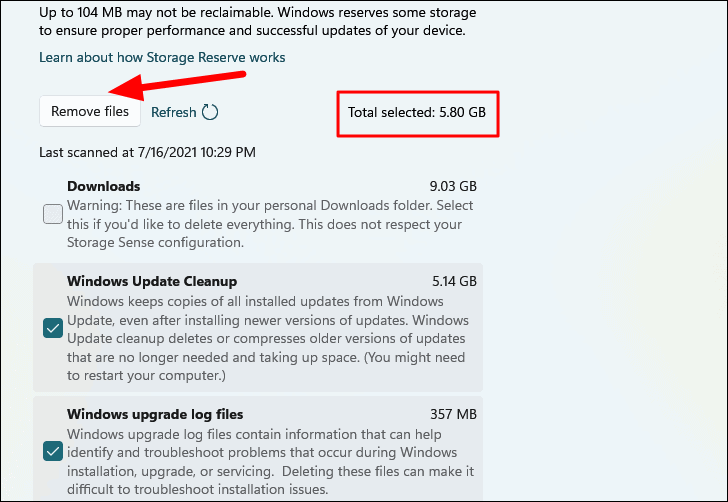
1. Using Disk Cleanup:
Disk Cleanup is a built-in Windows tool designed to identify and remove unnecessary files, including temporary files. It offers a user-friendly interface and provides options for customizing the cleanup process.
Steps to use Disk Cleanup:
- Open File Explorer: Press the "Windows" key + "E" to open File Explorer.
- Navigate to This PC: Click on "This PC" in the left pane.
- Right-click on the desired drive: Select the drive where you want to remove temporary files (usually the C: drive) and right-click on it.
- Select Properties: Choose "Properties" from the context menu.
- Open Disk Cleanup: In the Properties window, click on the "Disk Cleanup" button.
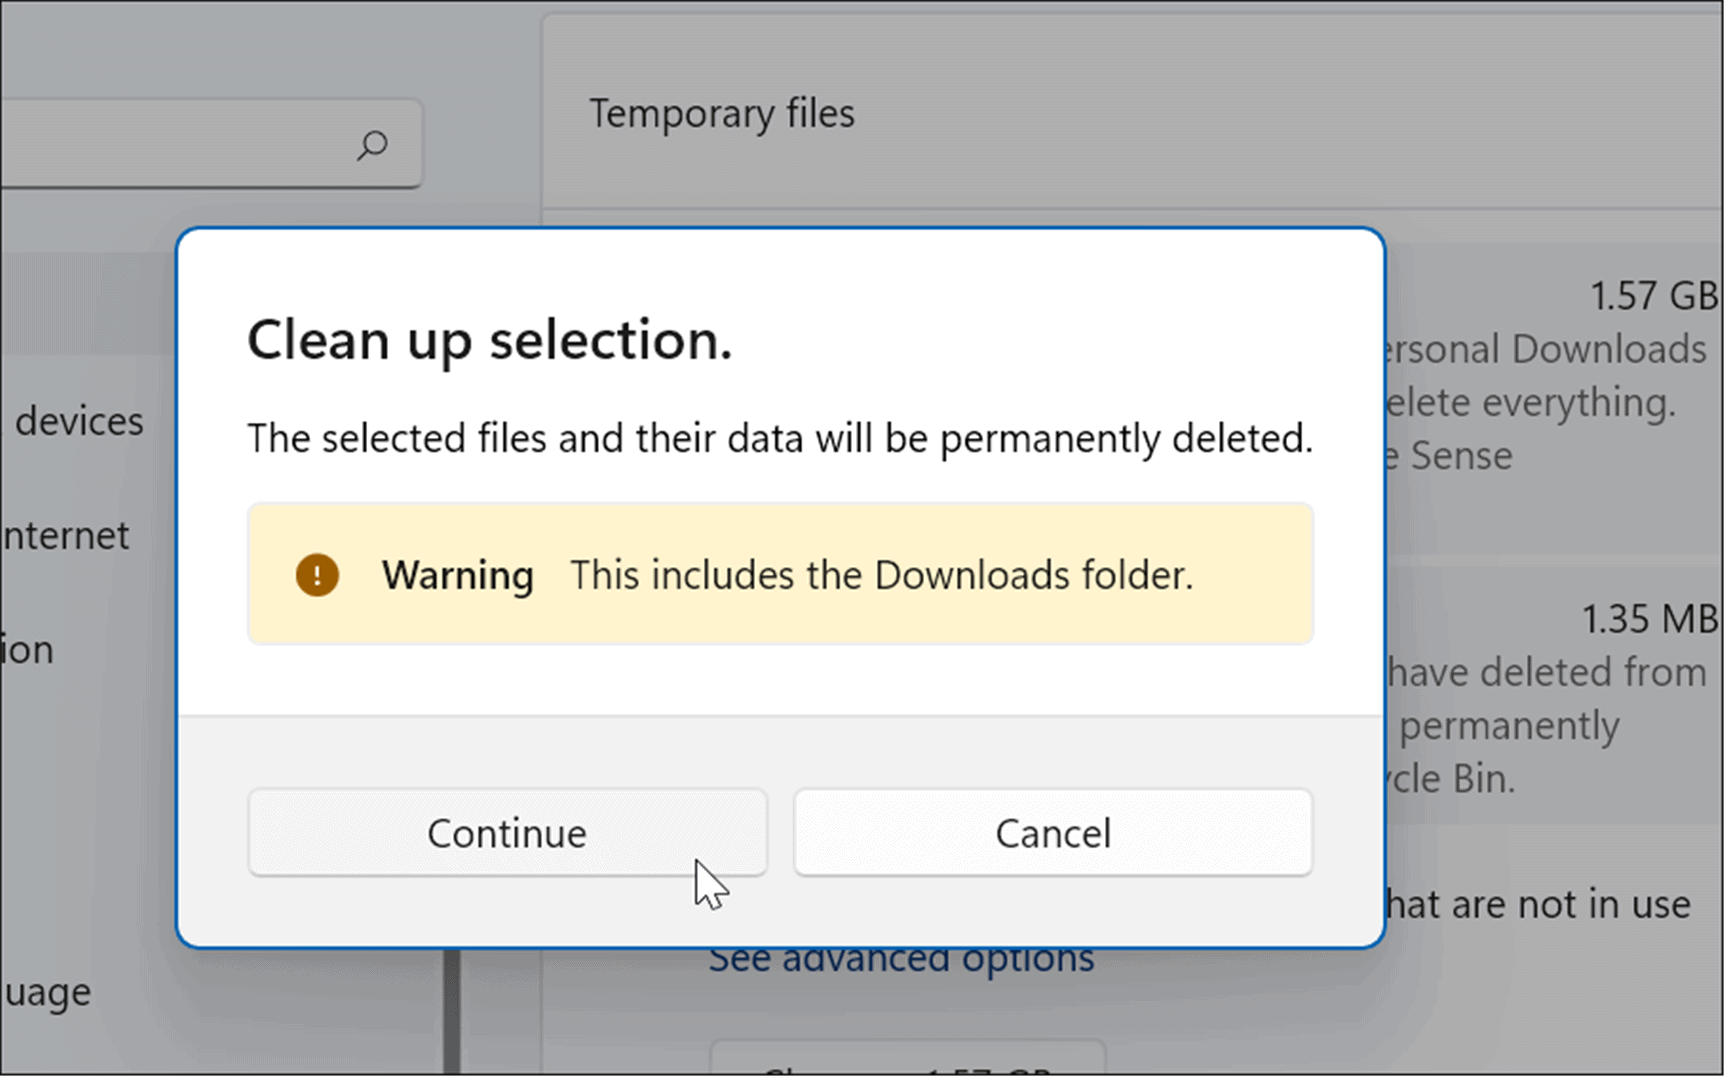
- Select temporary files: Once Disk Cleanup launches, check the box next to "Temporary files" and click "OK."
- Confirm deletion: A confirmation dialog box will appear. Click "Delete Files" to proceed.
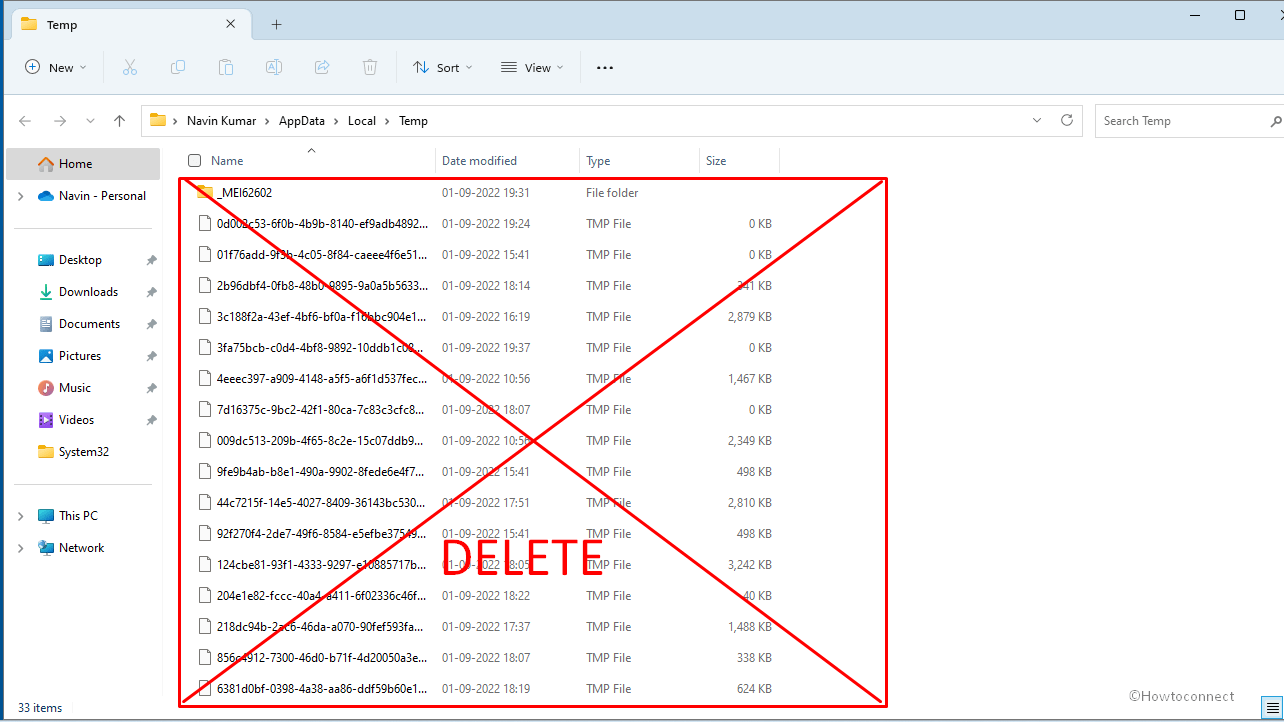
2. Manually Deleting Temporary Files:
Users can manually delete temporary files by navigating to specific system folders. This method offers greater control but requires familiarity with file system navigation.
Steps to manually delete temporary files:
- Open File Explorer: Press the "Windows" key + "E" to open File Explorer.
- Navigate to the Temp folder: In the address bar, type "%temp%" and press Enter. This will open the temporary files folder for your user account.
- Delete files: Carefully review the files and folders within the Temp folder. Delete any files you are confident are no longer needed.
- Repeat for system-wide Temp: To access the system-wide Temp folder, type "%systemroot%Temp" in the address bar and press Enter. Repeat the deletion process for files you are certain are no longer required.
3. Using Third-Party Cleaning Utilities:
Numerous third-party cleaning utilities are available, offering advanced features for deleting temporary files and other system clutter. These utilities often provide more comprehensive analysis and cleaning options compared to built-in tools.
Tips for Using Third-Party Cleaning Utilities:
- Choose reputable software: Opt for well-known and reliable cleaning utilities from reputable developers.
- Review settings carefully: Before using any cleaning utility, carefully review its settings and ensure you understand the cleaning process.
- Backup important data: Always back up your important data before using any cleaning utility, as accidental deletion can occur.
- Avoid aggressive cleaning: Avoid overly aggressive cleaning settings that might delete essential system files.
4. Using Command Prompt:
Experienced users can leverage the Command Prompt to delete temporary files using specific commands. This method offers greater control and flexibility but requires a deeper understanding of command-line operations.
Steps to delete temporary files using Command Prompt:
- Open Command Prompt: Search for "cmd" in the Windows search bar and select "Command Prompt" from the search results.
- Run the del command: Type the following command in the Command Prompt window and press Enter:
del /q /f /s "%temp%*"This command will delete all files in the user’s temporary folder without prompting for confirmation.
- Delete system-wide temporary files: To delete files in the system-wide temporary folder, use the following command:
del /q /f /s "%systemroot%Temp*5. Enabling Automatic Disk Cleanup:
Windows 11 allows users to schedule automatic Disk Cleanup tasks to regularly remove temporary files and other unnecessary data. This automated approach ensures consistent system maintenance without manual intervention.
Steps to enable automatic Disk Cleanup:
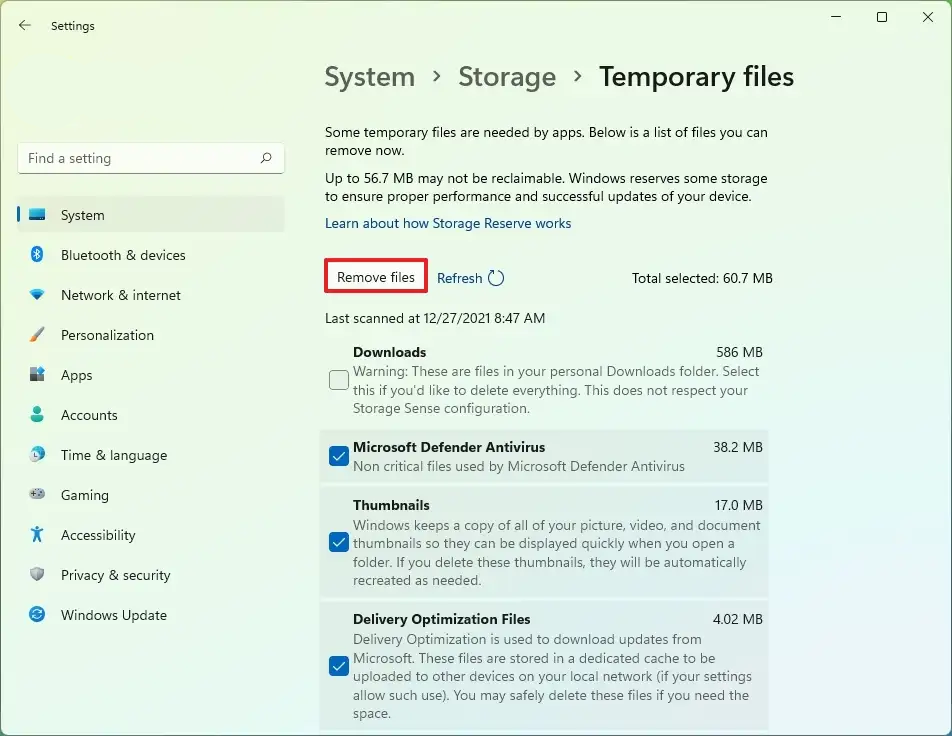
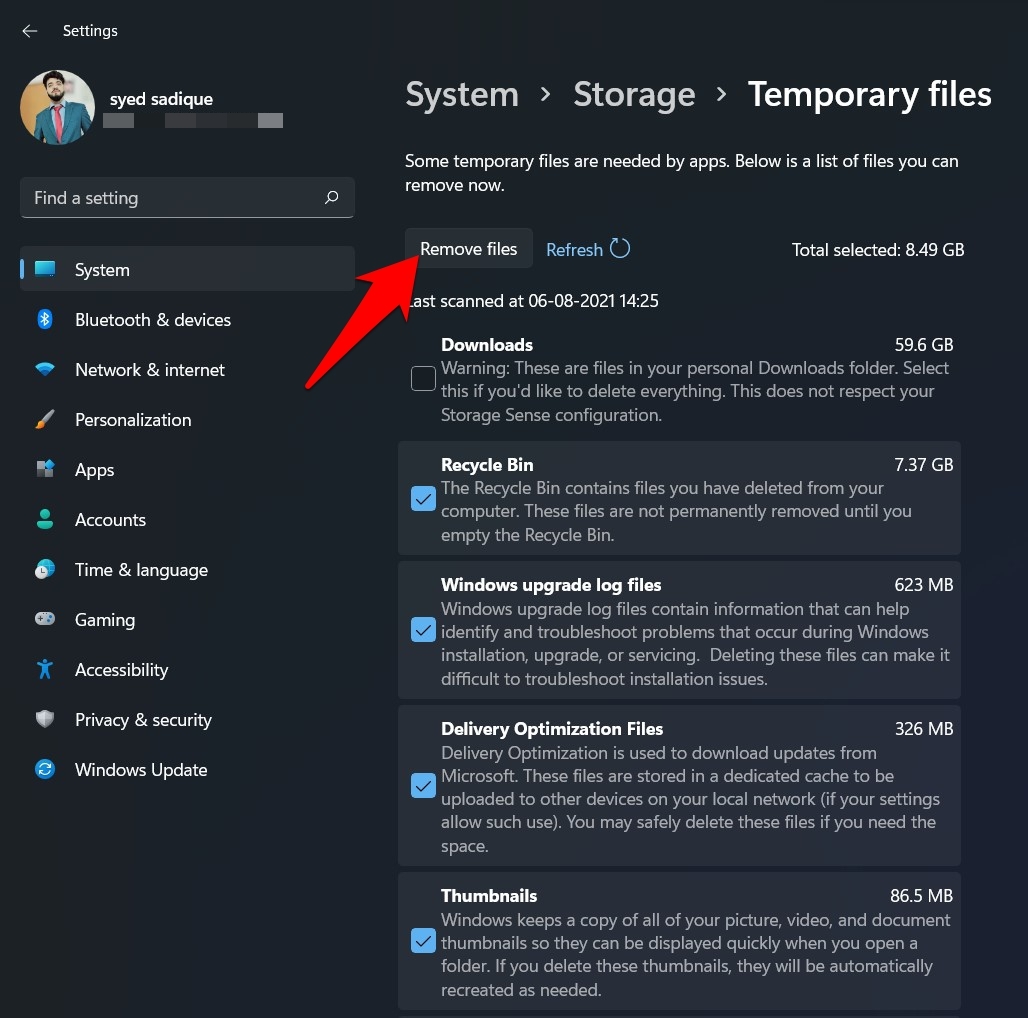
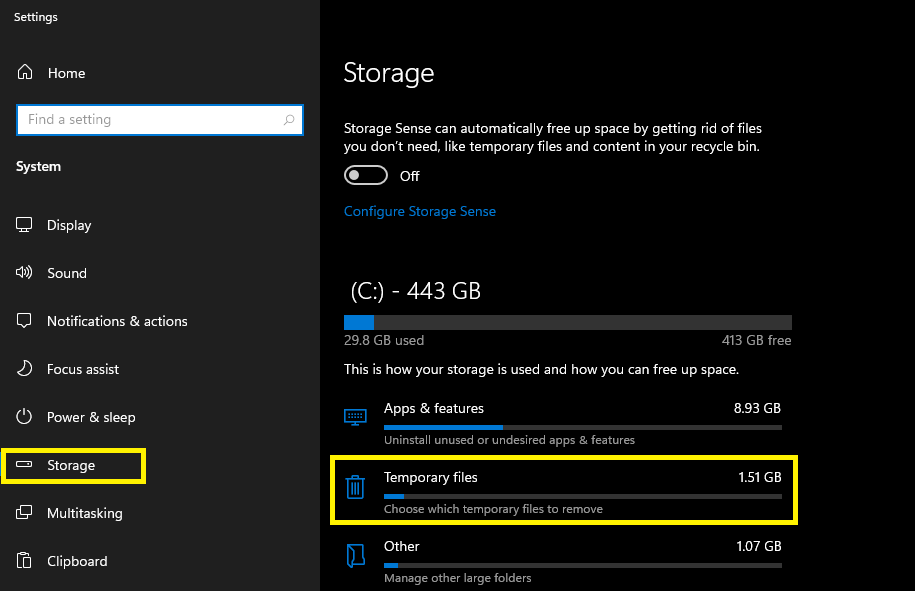
- Open Settings: Press the "Windows" key + "I" to open Settings.
- Navigate to System: Click on "System" in the left pane.
- Select Storage: Click on "Storage" in the right pane.
- Enable Disk Cleanup: Scroll down to the "Storage Sense" section and click on "Change how we free up space automatically."
- Select the frequency: Choose the desired frequency for Disk Cleanup to run automatically.
Frequently Asked Questions (FAQs)
1. Is it safe to delete temporary files in Windows 11?
Deleting temporary files in Windows 11 is generally safe. However, it is crucial to avoid deleting files within the system folders (e.g., "Program Files," "Windows") as this could lead to system instability.
2. What are the risks of deleting temporary files?
Deleting temporary files poses minimal risk if done correctly. However, accidentally deleting files within the system folders can cause system errors or instability. Always exercise caution and carefully review the files before deleting them.
3. How often should I delete temporary files?
There is no set schedule for deleting temporary files. However, it is recommended to do so at least once a month or whenever you notice a significant decrease in system performance.
4. Can I delete all temporary files at once?
While it is possible to delete all temporary files at once, it is not recommended. Some temporary files might be in use by running applications, and deleting them could lead to errors or crashes.
5. Can I prevent temporary files from being created?
It is not advisable to prevent temporary files from being created. These files are crucial for system operation and application functionality. Instead, focus on regularly deleting them to maintain a clean and efficient system.
Tips for Deleting Temporary Files in Windows 11
- Use a reliable cleaning utility: Opt for a reputable and well-reviewed cleaning utility to ensure safe and efficient cleaning.
- Review files carefully: Always carefully review the files before deleting them, especially in manually deleting files.
- Back up important data: Always back up your important data before using any cleaning utility or manually deleting files.
- Schedule automatic Disk Cleanup: Enable automatic Disk Cleanup to ensure regular maintenance and prevent the accumulation of temporary files.
- Avoid aggressive cleaning settings: Avoid overly aggressive cleaning settings that might delete essential system files.
Conclusion
Deleting temporary files in Windows 11 is an essential part of system maintenance. Regularly removing these files can free up disk space, enhance system performance, improve security, and optimize system stability. By utilizing the methods outlined in this article, users can effectively manage temporary files and ensure a smooth and efficient computing experience. Remember to exercise caution and carefully review files before deleting them to avoid potential system issues.


Closure
Thus, we hope this article has provided valuable insights into Clearing the Clutter: How to Delete Temporary Files in Windows 11. We hope you find this article informative and beneficial. See you in our next article!