Clearing the Clutter: How to Delete Temporary Files in Windows 11
Related Articles: Clearing the Clutter: How to Delete Temporary Files in Windows 11
Introduction
With great pleasure, we will explore the intriguing topic related to Clearing the Clutter: How to Delete Temporary Files in Windows 11. Let’s weave interesting information and offer fresh perspectives to the readers.
Table of Content
Clearing the Clutter: How to Delete Temporary Files in Windows 11
Windows 11, like its predecessors, utilizes temporary files to facilitate various processes, ranging from software installations to web browsing. These temporary files, while essential for smooth operation, can accumulate over time, consuming valuable disk space and potentially hindering performance. Regularly deleting these files can contribute to a more efficient and responsive system.
Understanding Temporary Files and Their Purpose
Temporary files, also known as cache files, are temporary data created by applications and the operating system to store information needed for various tasks. These files are often deleted automatically when the task is complete or the application is closed. However, some temporary files may linger, particularly if an application crashes or a process is interrupted.
The Importance of Deleting Temporary Files
Deleting temporary files offers several benefits:
- Increased Disk Space: Temporary files can consume significant disk space, particularly if they are not regularly cleared. By deleting these files, users can reclaim valuable storage space.
- Improved System Performance: Excessive temporary files can slow down system performance, particularly during resource-intensive tasks. Removing them can lead to a more responsive and efficient operating system.
- Enhanced System Stability: Temporary files can sometimes become corrupted or outdated, potentially causing system instability. Deleting them can help mitigate these issues.
- Reduced Security Risks: Some temporary files may contain sensitive information, such as passwords or browsing history. Deleting them can enhance system security by reducing the risk of unauthorized access.
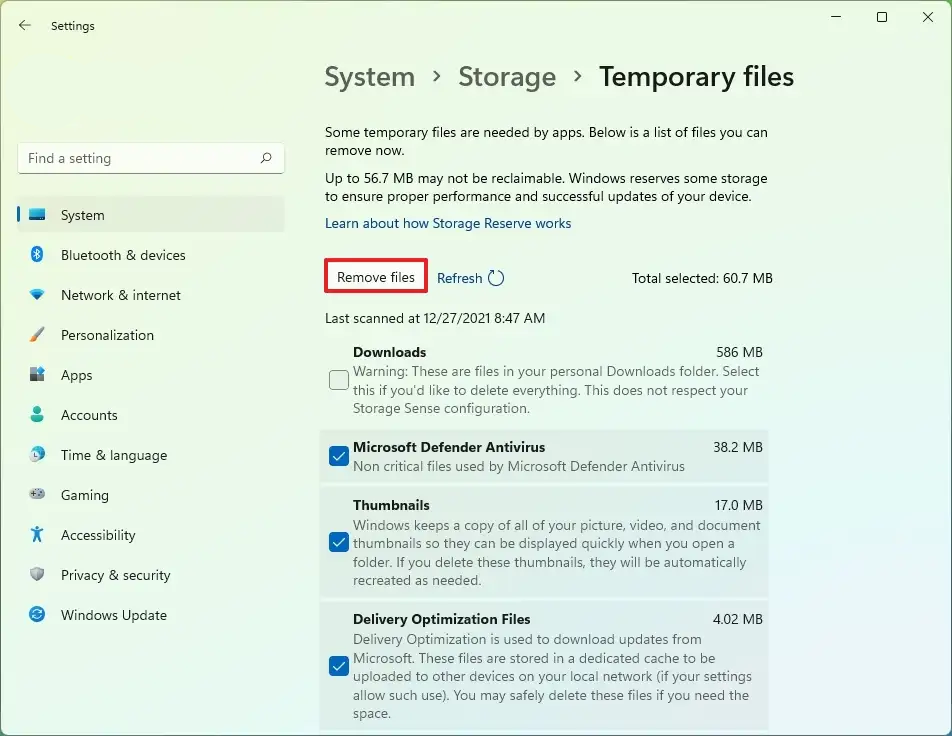
Methods for Deleting Temporary Files in Windows 11
Several methods can be employed to delete temporary files in Windows 11. The most common approaches are discussed below:
1. Using the Disk Cleanup Tool
Windows 11 comes equipped with a built-in Disk Cleanup tool designed to remove unnecessary files, including temporary files. This tool offers a user-friendly interface and provides granular control over the files to be deleted.
Steps:
- Open the Start menu and search for "Disk Cleanup."
- Select the "Disk Cleanup" app from the search results.
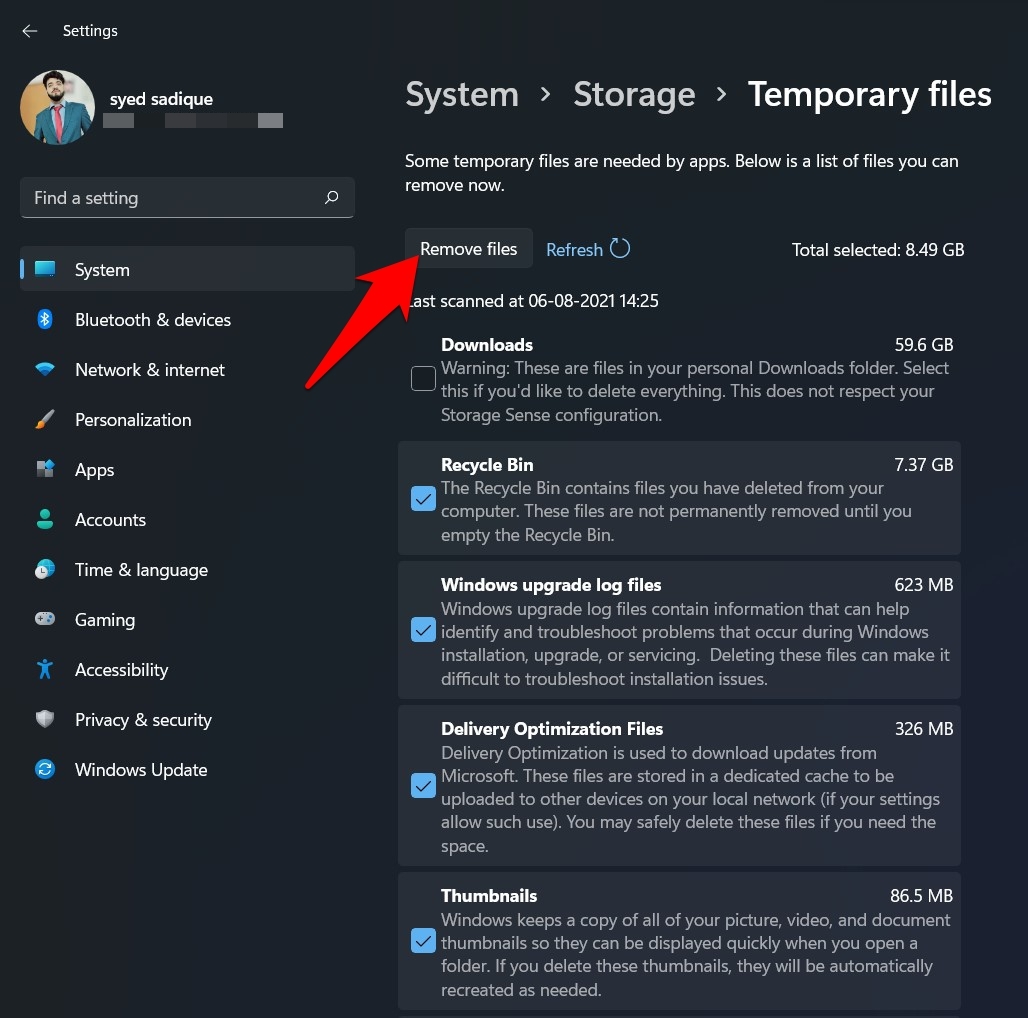
- Choose the drive you wish to clean.
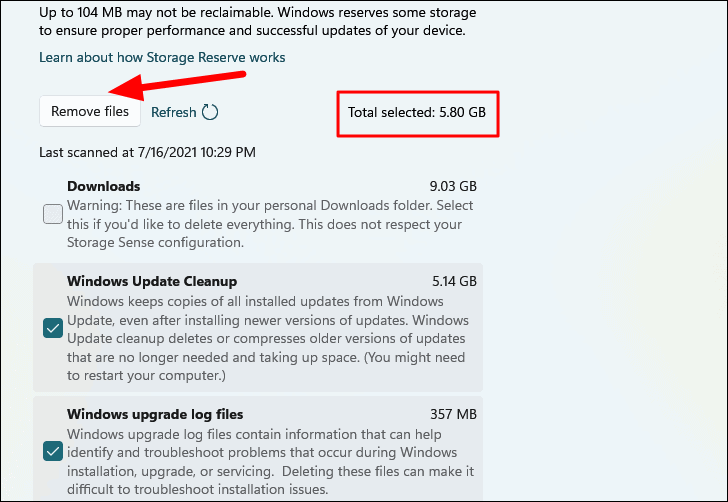
- The Disk Cleanup tool will scan the drive and display a list of files that can be deleted.
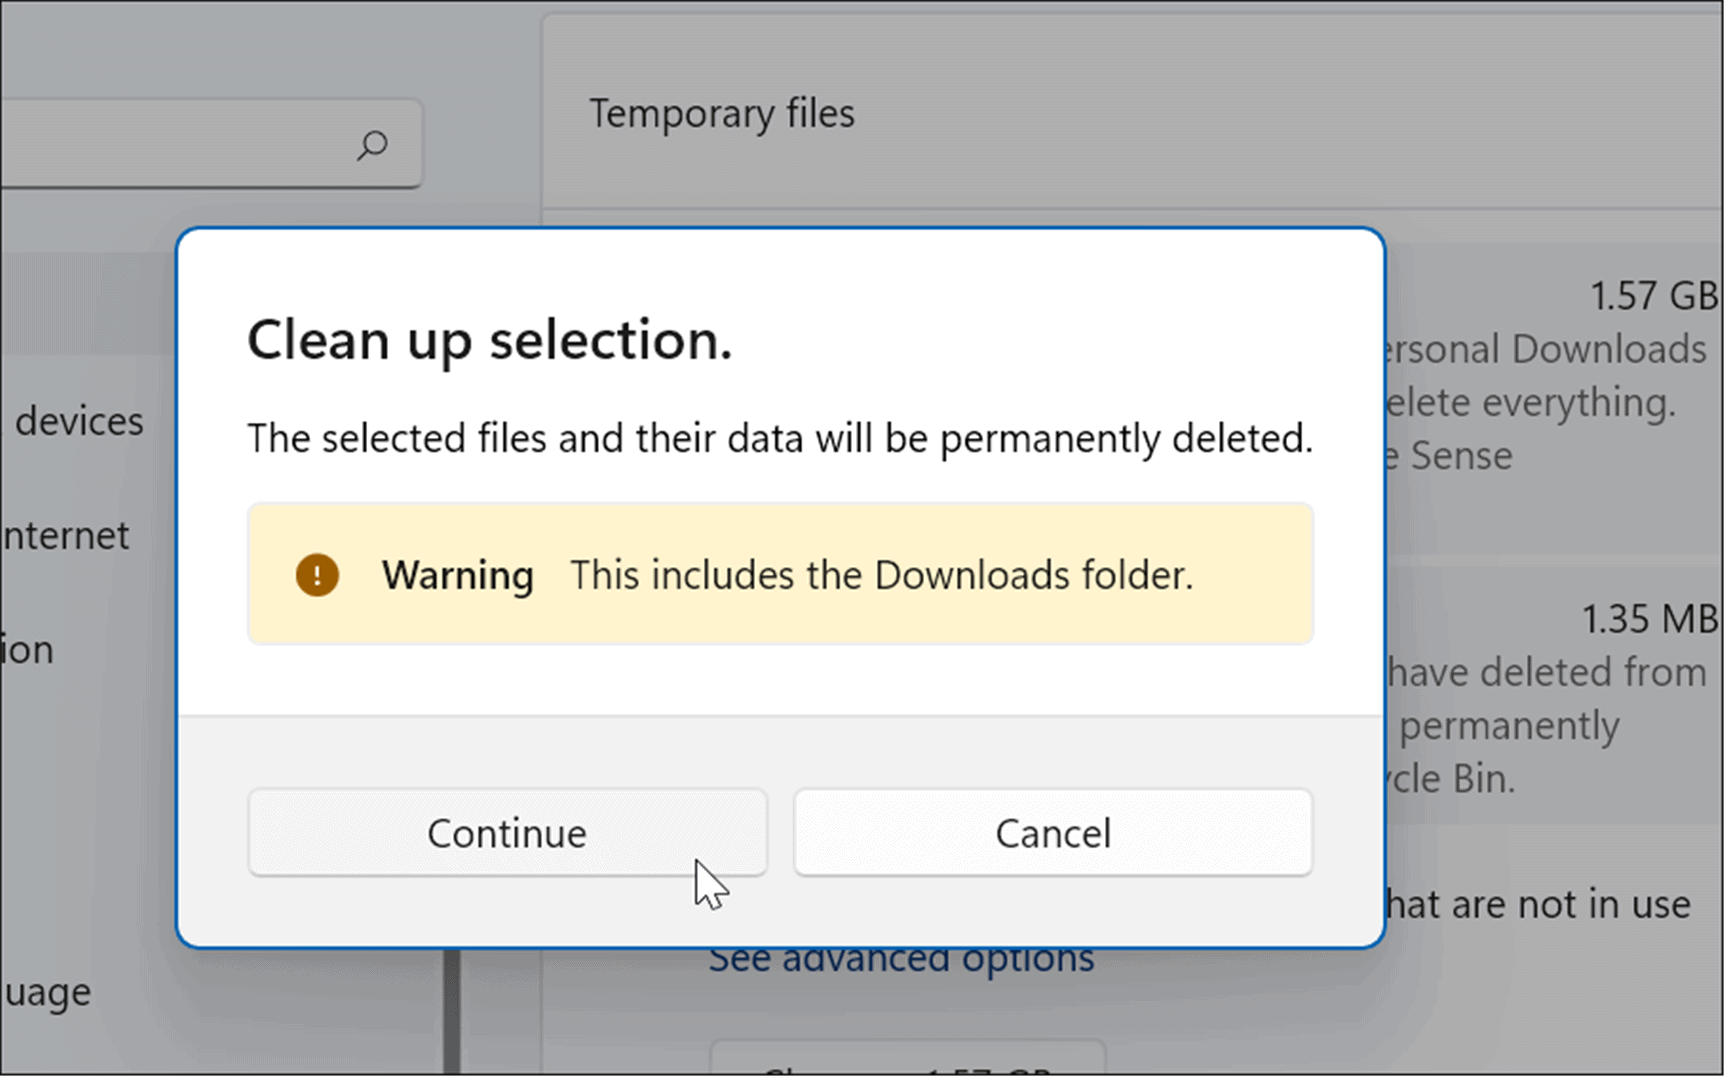
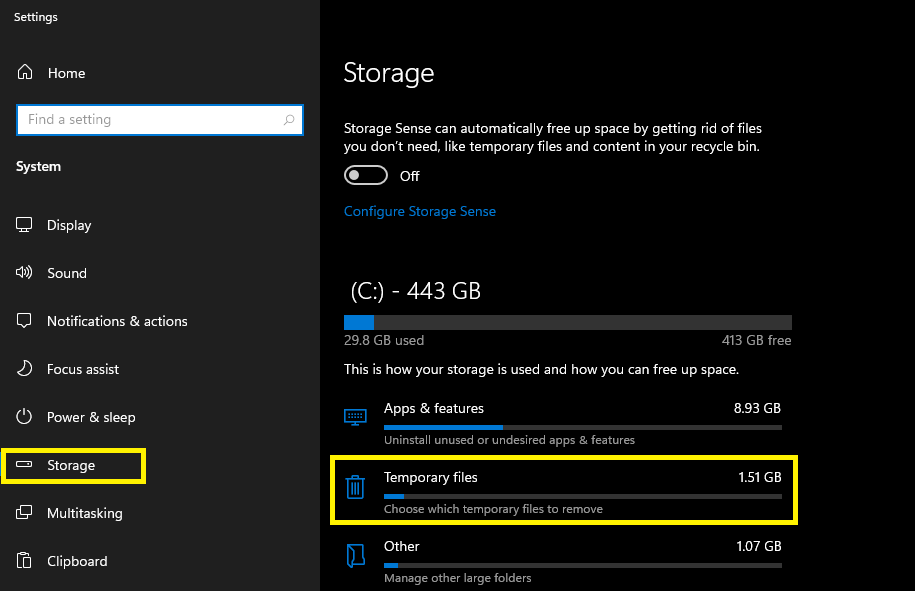
- Select the temporary files you wish to remove, including "Temporary files," "Downloaded program files," and "Recycle Bin."
- Click "OK" to initiate the cleanup process.
2. Manually Deleting Temporary Files
For advanced users, manually deleting temporary files can provide more control and flexibility. However, it is crucial to proceed with caution, as deleting the wrong files can lead to system instability.
Steps:
-
Open the File Explorer and navigate to the following locations:
- %temp%: This folder contains temporary files created by various applications.
- C:WindowsTemp: This folder stores temporary files used by the Windows operating system.
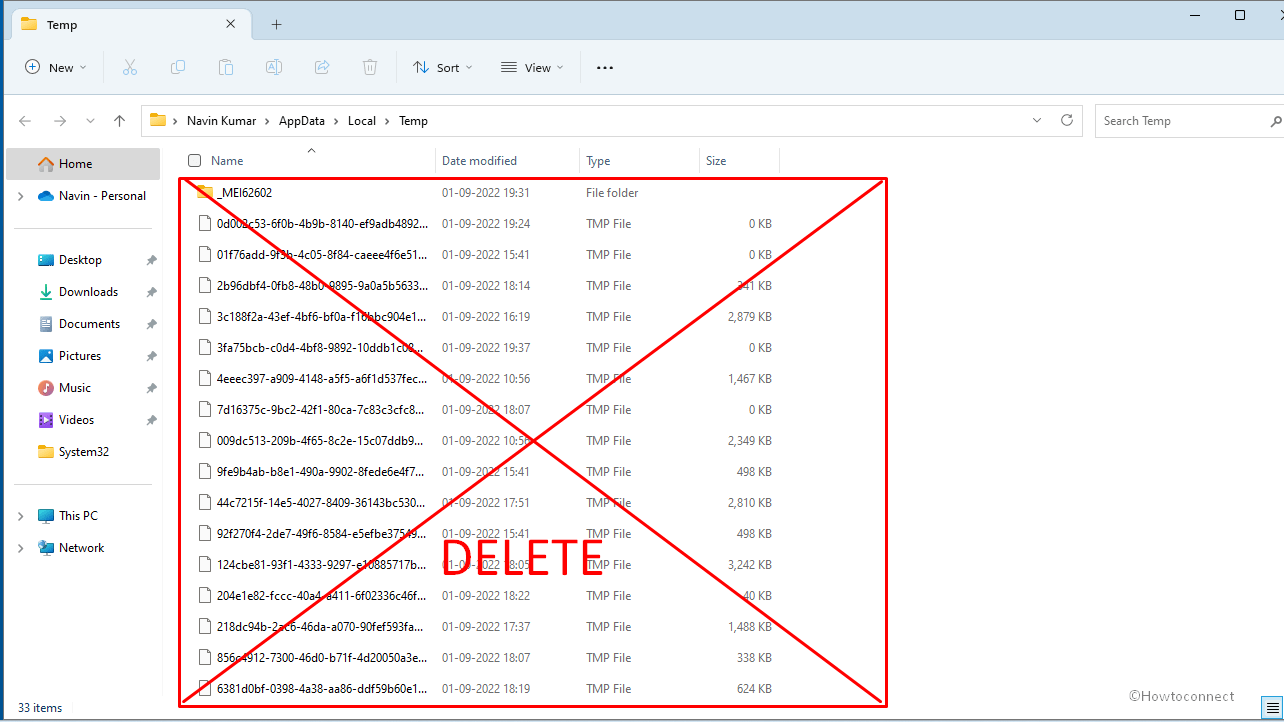
- C:UsersYourUsernameAppDataLocalTemp: This folder contains temporary files specific to your user account.
-
Select the files you wish to delete, ensuring you avoid essential system files.
-
Right-click on the selected files and choose "Delete."
3. Using Third-Party Cleaning Tools
Several third-party cleaning tools are available that can automatically scan and delete temporary files, along with other junk files. These tools often offer additional features, such as system optimization and privacy protection.
Tips for Using Third-Party Cleaning Tools:
- Choose reputable and well-reviewed cleaning tools.
- Read the tool’s documentation carefully before using it.
- Be cautious about deleting files you are unsure about.
- Consider using a free trial before purchasing a paid version.
4. Scheduling Regular Cleaning
To maintain a clean and efficient system, it is recommended to schedule regular temporary file cleaning. This can be done manually or by using automated tools.
Tips for Scheduling Cleaning:
- Set a reminder to run Disk Cleanup or a third-party cleaning tool weekly or monthly.
- Consider using a task scheduler to automate the cleaning process.
- Regularly empty the Recycle Bin.
FAQs about Deleting Temporary Files in Windows 11
Q: What are some common temporary file types?
A: Temporary files can have various extensions, such as .tmp, .log, .bak, .dat, and .ini. They are often created by applications and the operating system during installation, updates, or other processes.
Q: Is it safe to delete temporary files?
A: It is generally safe to delete temporary files, but it is essential to exercise caution. Avoid deleting files you are unsure about, as deleting essential system files can lead to system instability.
Q: Can I delete temporary files from a specific application?
A: Most applications have their own temporary file locations. You can typically find these locations in the application’s settings or documentation.
Q: Should I use Disk Cleanup or third-party cleaning tools?
A: Both options have their advantages. Disk Cleanup is a built-in tool that is reliable and user-friendly. Third-party cleaning tools often offer more advanced features and customization options.
Q: What if I accidentally delete an important file?
A: If you accidentally delete an important file, you can try to recover it using a data recovery tool. However, the success rate depends on factors such as the file type, the time since deletion, and the disk space used since the deletion.
Conclusion
Deleting temporary files in Windows 11 is a simple yet crucial task for maintaining system performance and stability. By regularly clearing these files, users can reclaim disk space, improve system responsiveness, and enhance overall system security. Whether using the built-in Disk Cleanup tool, manually deleting files, or utilizing third-party cleaning tools, users can effectively manage temporary files and optimize their Windows 11 experience. Remember to exercise caution when deleting files and to consider scheduling regular cleaning to ensure a clean and efficient system.


Closure
Thus, we hope this article has provided valuable insights into Clearing the Clutter: How to Delete Temporary Files in Windows 11. We thank you for taking the time to read this article. See you in our next article!