A Comprehensive Guide to Installing Windows 11: A Step-by-Step Walkthrough
Related Articles: A Comprehensive Guide to Installing Windows 11: A Step-by-Step Walkthrough
Introduction
With great pleasure, we will explore the intriguing topic related to A Comprehensive Guide to Installing Windows 11: A Step-by-Step Walkthrough. Let’s weave interesting information and offer fresh perspectives to the readers.
Table of Content
A Comprehensive Guide to Installing Windows 11: A Step-by-Step Walkthrough
The release of Windows 11 marked a significant milestone in the evolution of Microsoft’s operating system. It introduced a redesigned interface, enhanced security features, and improved performance, making it an attractive upgrade for many users. However, installing Windows 11 can seem daunting for those unfamiliar with the process. This article aims to provide a detailed, step-by-step guide to installing Windows 11, addressing common concerns and offering helpful tips along the way.
Understanding the Prerequisites
Before embarking on the installation process, it is crucial to ensure your computer meets the minimum system requirements for Windows 11. These requirements are designed to ensure optimal performance and compatibility. Key factors to consider include:
- Processor: A compatible 1 gigahertz (GHz) or faster processor with at least two cores.
- RAM: At least 4 gigabytes (GB) of RAM.
- Storage: At least 64 GB of storage space.
- Graphics Card: A compatible graphics card that supports DirectX 12 or later.
- Display: A high-definition (HD) display with a minimum resolution of 1366 x 768 pixels.
- Internet Connection: A stable internet connection is required for downloading and activating Windows 11.
Preparing for Installation
Once you have verified that your system meets the requirements, it’s time to prepare for the installation. This involves backing up your essential data, understanding the different installation methods, and choosing the appropriate one for your needs.
1. Backing Up Your Data:
Before proceeding with the installation, it is strongly recommended to back up all your important data. This includes documents, photos, videos, and other files that you want to preserve. You can use various methods for backing up your data, such as:
- External Hard Drive: This is a reliable and convenient option for storing large amounts of data.
- Cloud Storage: Services like Google Drive, Dropbox, or OneDrive allow you to store data online, making it accessible from any device.
- USB Flash Drive: This is a portable and convenient option for backing up smaller amounts of data.
2. Choosing the Right Installation Method:
There are two primary methods for installing Windows 11:
- Upgrade: This method involves installing Windows 11 directly over your existing Windows 10 installation. This is the simplest option, but it requires a compatible Windows 10 version.
- Clean Install: This method involves formatting your hard drive and installing Windows 11 from scratch. This option provides a fresh start and can be helpful for resolving issues with your existing operating system.
3. Obtaining the Windows 11 Installation Media:
To install Windows 11, you will need the installation media, which can be either a USB flash drive or a DVD. You can create the installation media using the Microsoft Media Creation Tool, available on the official Microsoft website.
The Installation Process: A Detailed Walkthrough
1. Creating the Installation Media:
- Download the Microsoft Media Creation Tool from the official Microsoft website.
- Run the tool and follow the on-screen instructions.
- Select the "Create installation media for another PC" option.
- Choose the language and edition of Windows 11 you want to install.
- Select the USB flash drive or DVD as the destination for the installation media.
- Wait for the tool to create the installation media.
2. Starting the Installation:
- Connect the USB flash drive or insert the DVD into your computer.
- Restart your computer and press the appropriate key to enter the BIOS menu. This key varies depending on the motherboard manufacturer.
- In the BIOS menu, select the USB flash drive or DVD as the boot device.
- Save the changes and exit the BIOS menu.
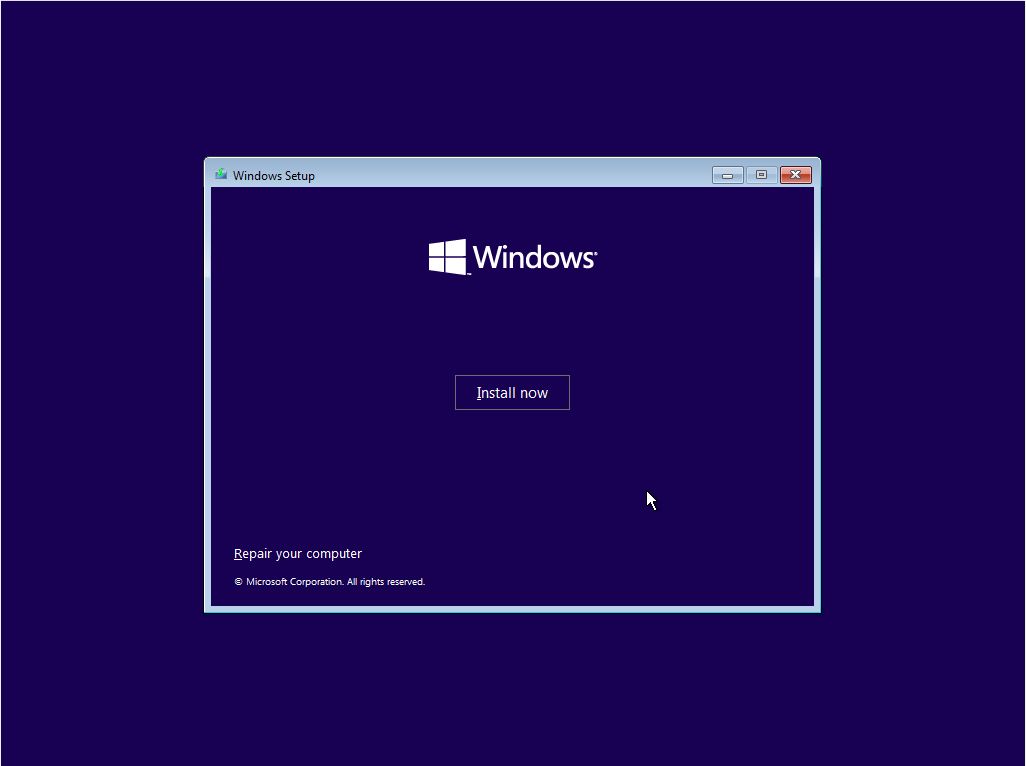
3. Installing Windows 11:
- The Windows 11 setup process will begin automatically.
- Follow the on-screen instructions carefully.
- Select your preferred language, time zone, and keyboard layout.
- Accept the license terms and conditions.
- Choose whether to perform an upgrade or a clean install.
- If performing a clean install, select the partition where you want to install Windows 11.
- Wait for the installation process to complete.
4. Setting Up Your New Installation:
- Once the installation is complete, you will be prompted to create a user account.
- Choose a username and password.
- Set up your internet connection.
- Install any necessary drivers for your hardware.
Troubleshooting Common Installation Issues
While the installation process is generally straightforward, you may encounter some issues. Here are some common problems and their solutions:
- Error Code 0x8007000D: This error code indicates that the installation files are corrupted. Try downloading the installation media again.
- Error Code 0x80070070: This error code indicates that there is a problem with the hard drive. Try running a hard drive check using the built-in Windows tools.
- Error Code 0x80070057: This error code indicates that the installation media is not bootable. Try creating the installation media again.
- Blue Screen of Death: This error indicates a hardware or software issue. Try booting into Safe Mode and running a system scan.
FAQs Regarding Windows 11 Installation
1. Can I upgrade from Windows 7 or 8.1 to Windows 11?
No, you cannot directly upgrade from Windows 7 or 8.1 to Windows 11. You will need to first upgrade to Windows 10 and then upgrade to Windows 11.
2. Can I install Windows 11 on a virtual machine?
Yes, you can install Windows 11 on a virtual machine. However, you will need to ensure that your virtual machine software is compatible with Windows 11.
3. Can I use a USB flash drive with a smaller capacity than the installation files?
No, the USB flash drive must have enough storage space to accommodate the entire Windows 11 installation files.
4. What happens to my existing data during the installation process?
If you are performing an upgrade, your existing data will be preserved. However, if you are performing a clean install, your data will be erased.
5. How can I activate Windows 11 after installation?
You can activate Windows 11 using a product key, a digital license, or by linking your account to a Microsoft account.
Tips for a Smooth Windows 11 Installation
- Ensure you have a stable internet connection: A stable internet connection is crucial for downloading and activating Windows 11.
- Back up your data before starting the installation: This will protect your important files in case of any issues.
- Check your system requirements: Ensure your computer meets the minimum system requirements for Windows 11.
- Disable antivirus software: Antivirus software can interfere with the installation process.
- Disconnect external devices: Disconnect any unnecessary external devices, such as printers and scanners.
- Consider using a clean install: A clean install provides a fresh start and can help resolve issues with your existing operating system.
Conclusion
Installing Windows 11 can be a straightforward process with the right guidance. By carefully following the steps outlined in this article, you can successfully upgrade or install Windows 11 on your computer. Remember to back up your data, understand the installation methods, and troubleshoot any issues that may arise. With the right preparation and a little patience, you can enjoy the benefits of Windows 11 on your computer.


Closure
Thus, we hope this article has provided valuable insights into A Comprehensive Guide to Installing Windows 11: A Step-by-Step Walkthrough. We hope you find this article informative and beneficial. See you in our next article!